Raw Shredded Brussels Sprout Salad
Posted: October 25, 2015 Filed under: Diet- comedy, Recipes Leave a comment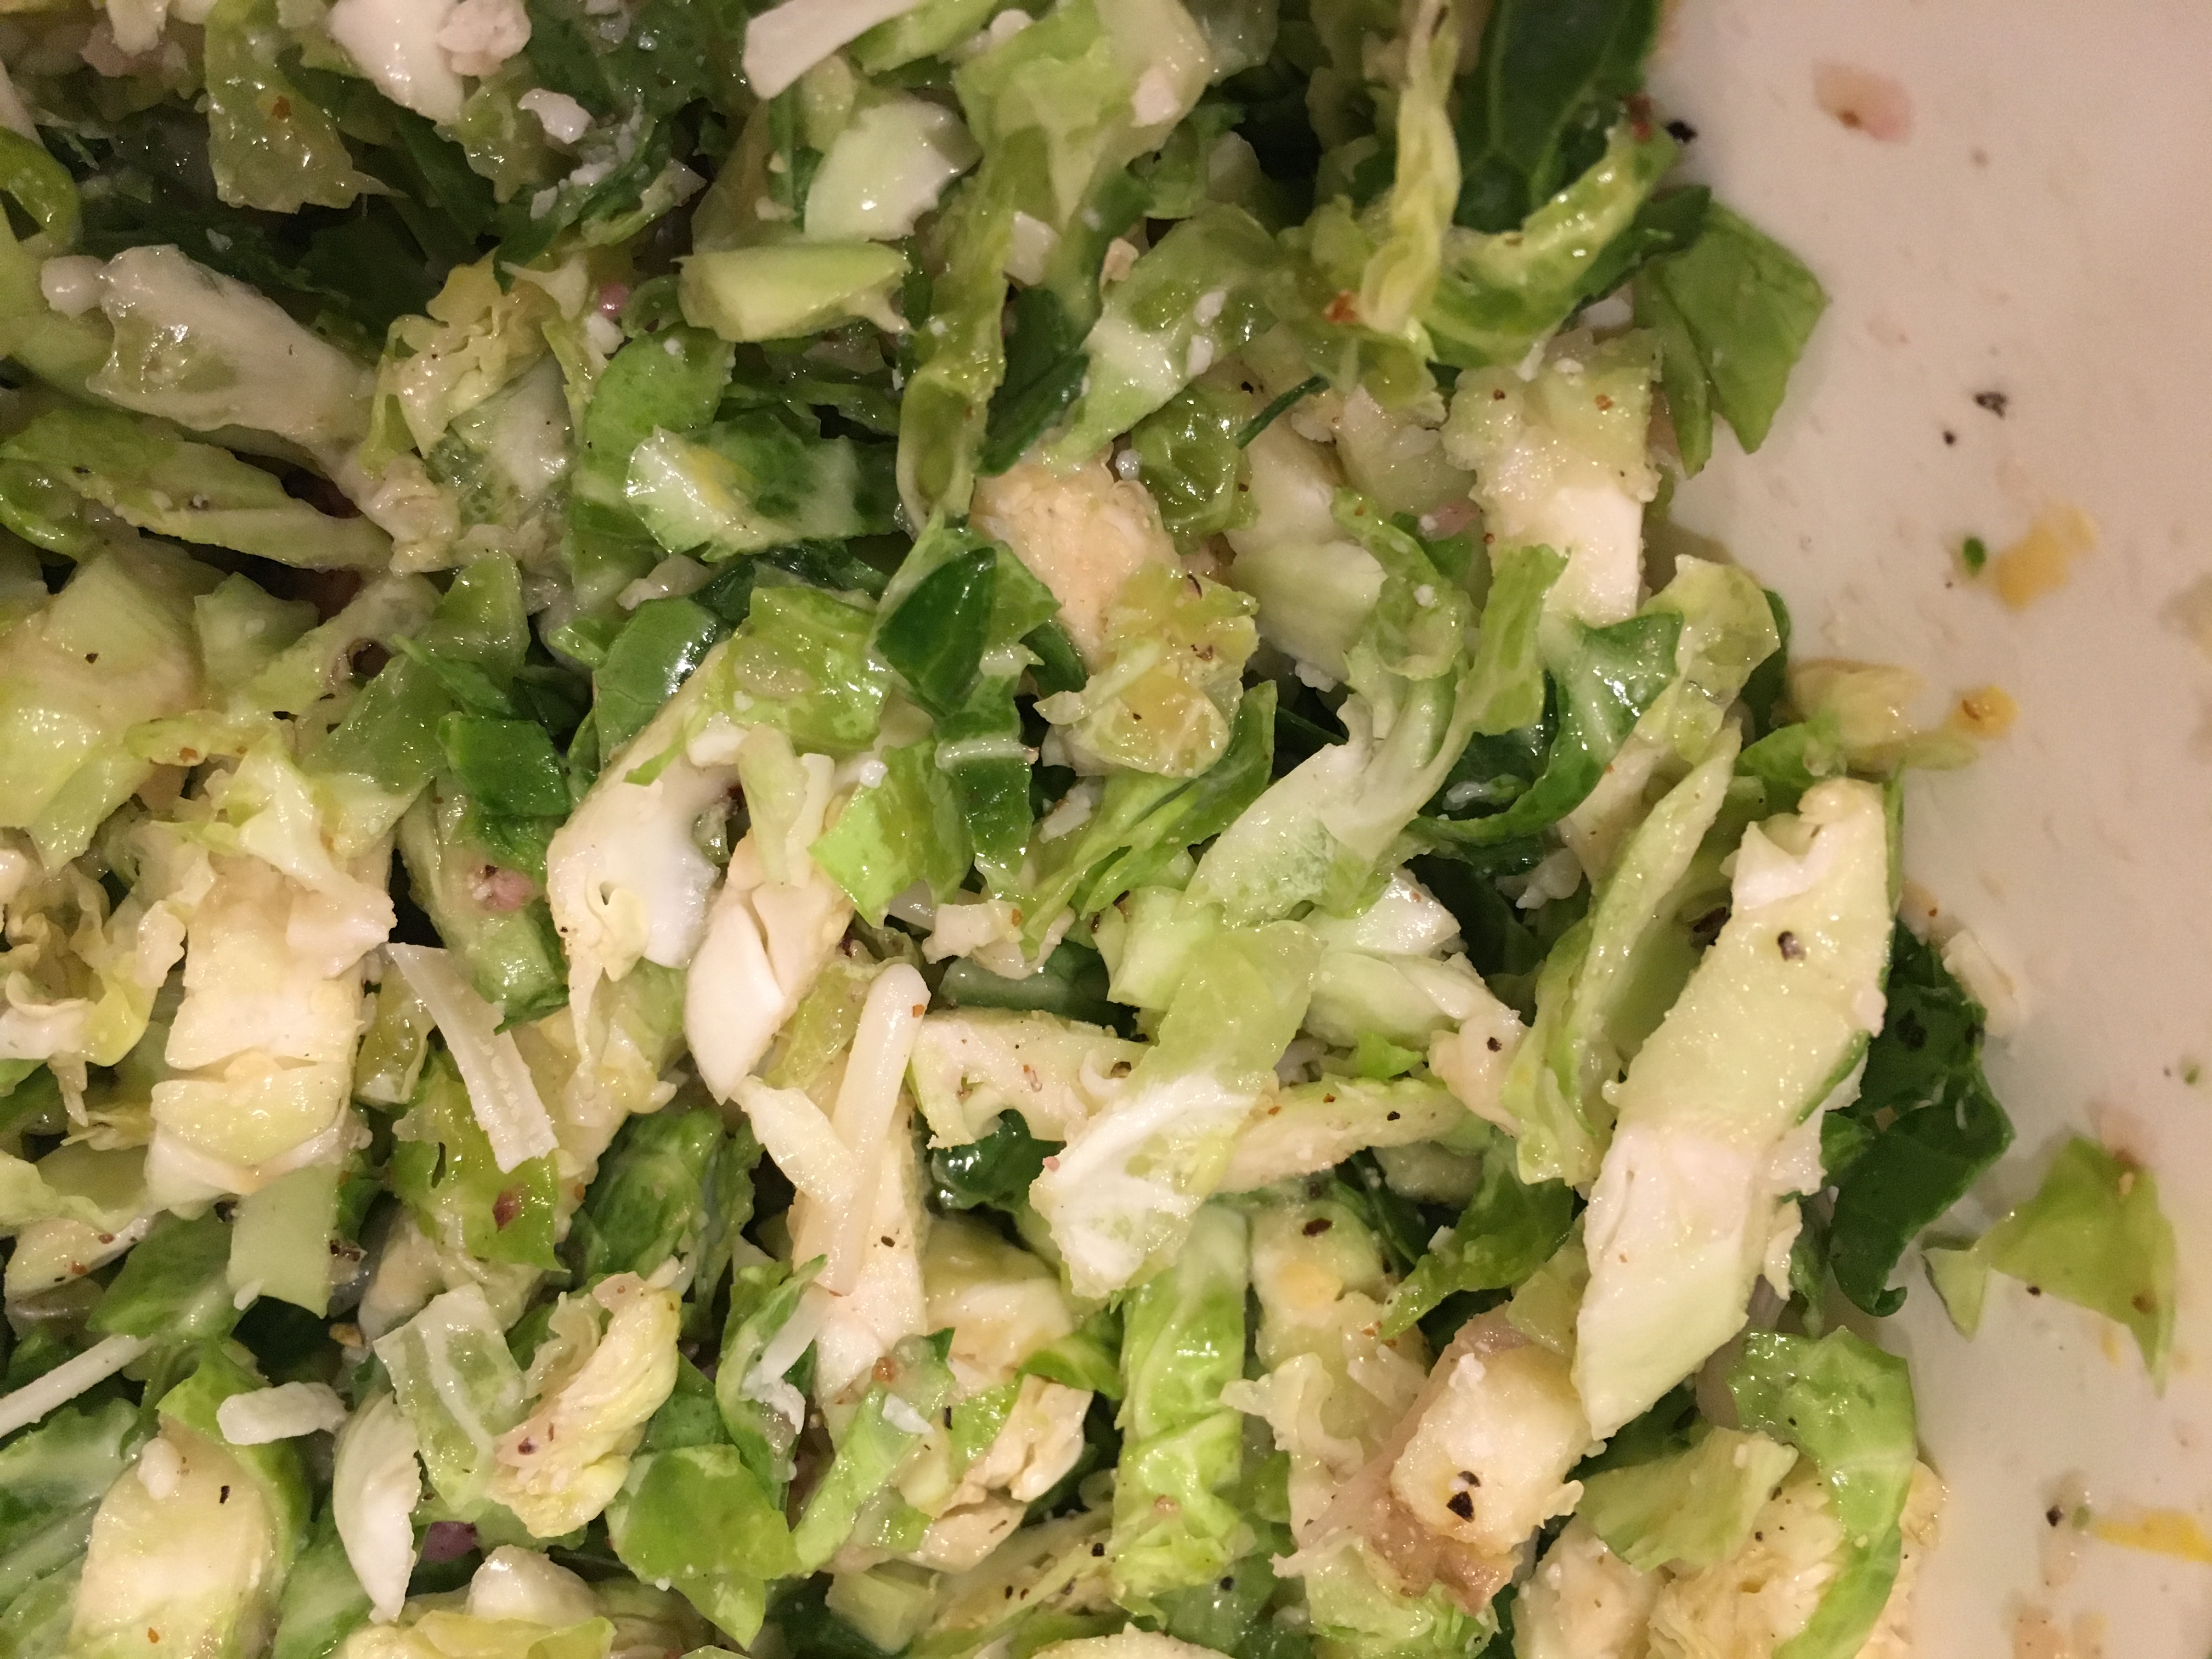
If you asked me to eat a Brussels sprout in any form thirty years ago you would have gotten a sourpuss face from me. There was never a vegetable I hate more. Many a Brussels went in the trash in my paper dinner napkin. How my taste buds have changed. Now I even like them raw. This little salad, which could be considered almost a slaw – I put some cold sliced steak on mine and it made the perfect lunch.
1 large shallot- grated on a micro plane
Zest and Juice of one lemon
1 t. Dijon Mustard
3 T. red Wine Vinegar
2 t. olive oil
2 packets of Splenda
Lots of Black Pepper and a little salt
1 Bag of shredded Brussels sprouts form Trader Joes – or a pound of whole Brussels shredded on a mandolin
½ cup. Grated Parmesan Cheese
In a large bowl mix up the shallot, lemon juice and zest, mustard, vinegar, oil and Splenda. Add the shredded sprouts and mix well. Crack a bunch of black pepper and add the Parmesan Cheese. Taste and see if any salt is needed.
Vegetables From My Garden, Mostly, Hash
Posted: June 27, 2015 Filed under: Recipes 2 Comments
The one bad thing about going away for five days is that my garden did one of two things, one over produce giant zucchini or plants die all together. I have had years of trouble with tomato plants, they grow bear fruit and then wither and die after one round of tomatoes. Before I left for the boat the tomatoes were doing fine, except for the parts eaten by dear. I came home yesterday and the plants are about to expire with a load of fruit, some ripe, others still green. If I were not on such a strict diet I would make fried green tomatoes, but not now.
I am eating zucchini as fast as can, but I am getting a little sick of the quick sauté method. Tonight I decided to use some of everything I harvested in a hash, sans potatoes. My only refrigerator staple I added was mushrooms.
3 large Mushrooms sliced
1 medium Zucchini diced
2 handfuls of green beans, steamed and cut in thirds
20 cherry Tomatoes, halved
Sprinkling of Oregano
Dashes of garlic powder
Salt and Pepper
Heat a hot fry pan on high and spray with Pam. Throw the mushrooms in the pan. Cook for two minutes and then flip them over and cook another minute.
Add the zucchini and cook for three minutes, stirring once or twice. Add the garlic and oregano. Add the green beans and cherry tomatoes and cook another two minutes. Season with salt and pepper.
Grown Too Big Zucchini Bread
Posted: June 13, 2015 Filed under: Recipes 2 Comments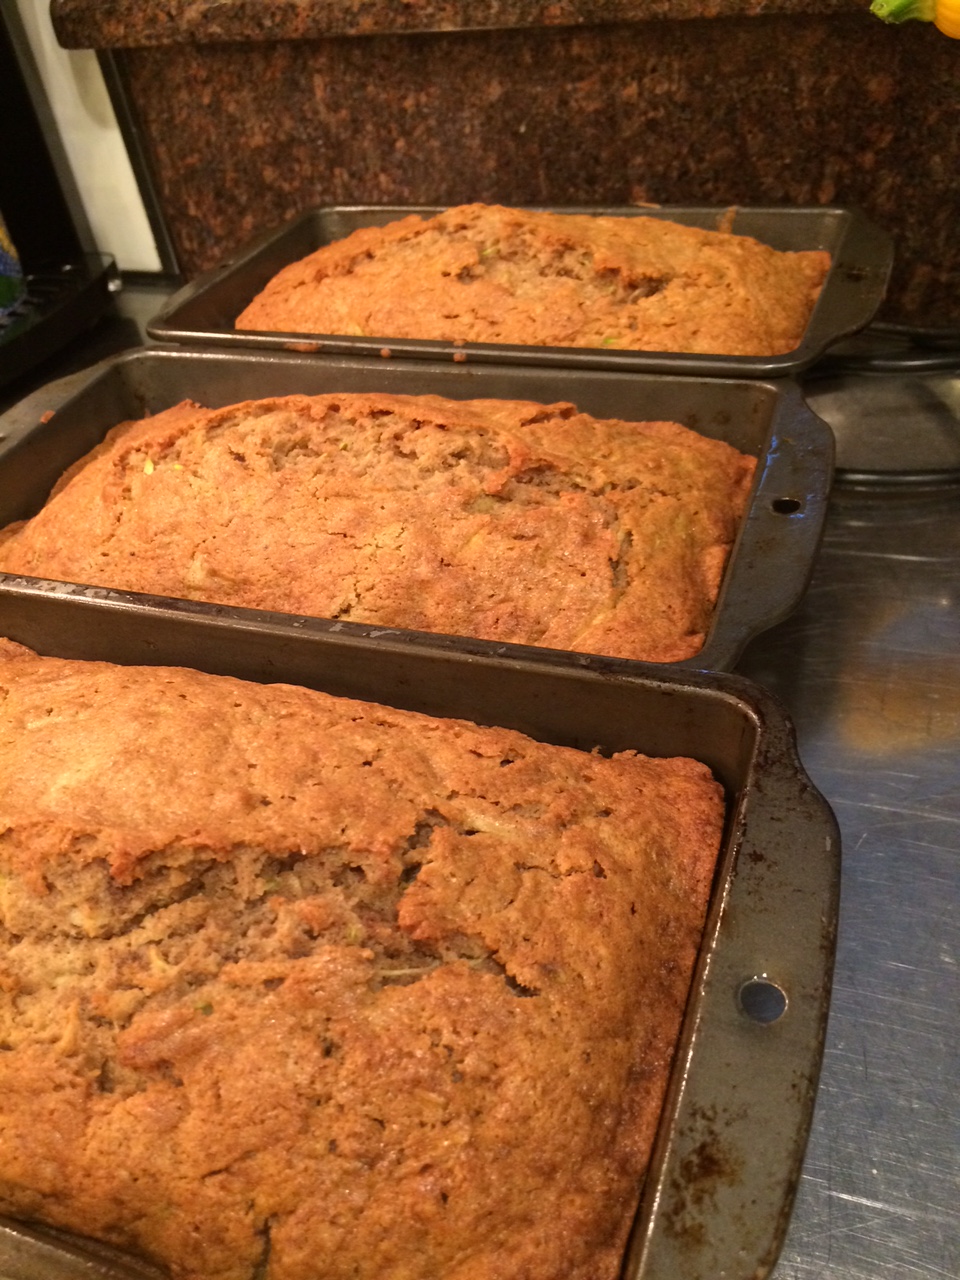

For no other reason than plain laziness I did not harvest my garden everyday this week. I have no excuse. I was spending plenty of time watering it since we have had little to no rain, but I just did not look under the giant leaves of my many squash plants.
Yesterday I pulled four baseball bat zucchini out of the garden followed by two more today along with two bowling pin yellow squash. I’m not sure if I am going to be able salvage the yellow squash, but I was determined to use the zucchini, even if it meant making something I could not even take one bit of.
I made three loaves and begged Russ to taste it to let me know if it worked. I got two thumbs up so I made three more loaves. It was the perfect way to use the otherwise inedible vegetables.
Normally I would grate a zucchini with the skin on to make bread, but in this case I peeled them first so that I did not have any toughness. I also cut the peeled flesh in half and scooped out the seedy center before I ran the crescent shaped squash pieces in the Cuisinart with the grating blade.
3 cups flour
1 cup of sugar
1 ½ t. baking powder
1 ½ t. baking soda
2 t. cinnamon
½ t. freshly grated nutmeg
4 large eggs beaten
1 cup of oil
1 t. vanilla extract
4 cups of grated Zucchini
Preheat the oven to 350 degrees.
In a large mixing bowl mix together the dry ingredients. In a separate bowl mix the wet ingredients, minus the zucchini. Pour the wet into the dry and mix just until all the dry is moist. Add the zucchini and stir until it is well distributed.
Prepare two small bread pans with pam or other grease. Divide the batter between the two pans. Place in the oven and bake for 50-55 minutes.
I doubled the recipe and divided the batter between three larger bread pans and baked for 60 mins.
Remove from oven and let cool on a rack on the counter.
Dressing Doctoring
Posted: June 1, 2015 Filed under: Recipes 1 Comment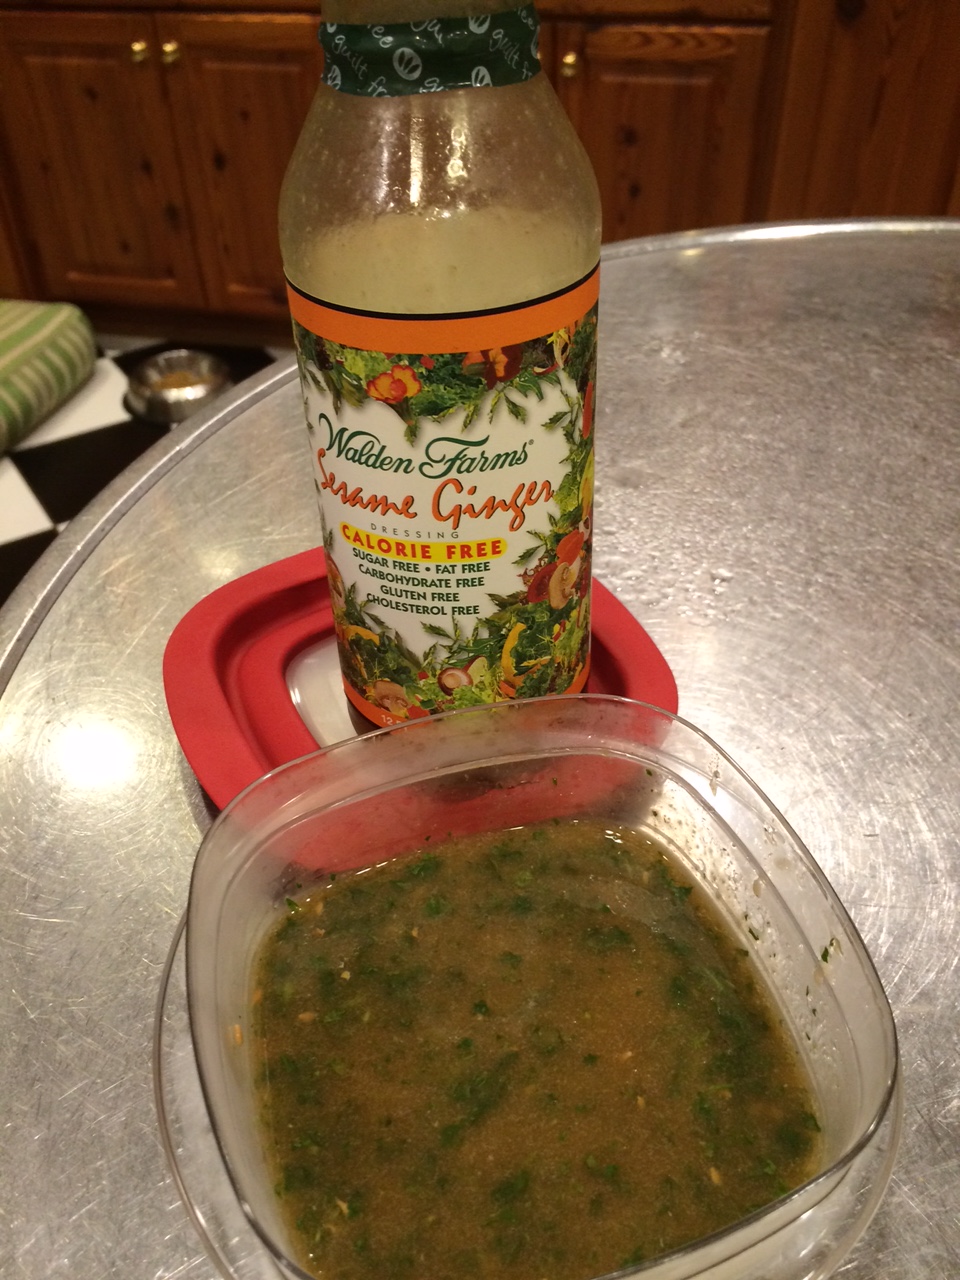
In my attempt to lose the weight I gained in the month of December, on our trip to Italy and during May, otherwise known as the month of me, I enrolled in a weight loss program that was different than my own self designed plan. I needed to hand my problem over to someone else who could just tell me what to do.
So far it is working great. I have lost all the weight I gained since returning from Italy and that is just on the pre-conditioning diet. Wednesday I start the real diet, which will be harder than the pre-conditioning. What I eat is not so different, except I don’t eat cheese or vinegar in unlimited amounts like I used to. I have been instructed to use Walden Farms zero calorie dressing and it is a basic affront to everything I am about.
I have not been a bottled dressing kind of gal for years and years so to ask me to eat this stuff has been hard on my palette. I would just use lemon juice, but that too has been limited to 1 teaspoon a day and I need every drop of it for my tea. I finally came up with the answer, I doctored the bottled dressing with some things I am allowed to have. I have to say I am fairly happy with the outcome.
Sesame Ginger Dressing Redone
In a blender put the following
¼ cup of Walden Farms 0 calorie Sesame Ginger Dressing
Ten fresh basil leaves
Handful of fresh cilantro including the stems
2 t. limejuice
1 clove of garlic
½ inch of grated fresh ginger
Whirl that mother up until the herbs are just tiny bits. If you like spicy add a few red pepper flakes. It is infinitely better that the stuff right out of the bottle.
I may be able to survive being told exactly what to eat for a few weeks now.
Healthier Red Beans and Rice
Posted: May 30, 2015 Filed under: Recipes 1 Comment
I am in charge of bringing a vegetarian main dish to a church supper for new members tomorrow. I decided to go all out and even make it vegan just in case. I have a giant bag of rice that I can’t eat on my current diet so I wanted to use some of that, and then it hit me, Red Beans and rice, the perfect vegan dish that I can make ahead. Of course I usually would make red beans and rice with a smoked ham hock to add flavor and then fat too, but that was out of the question. The answer was to use smoked Paprika to bring that smoky flavor without the meat. The other oddity is I added light grape juice to bring sweetness and a little bit of, “Hmm, what is that?” So here is my vegan version
Spice Mix
2 T. kosher salt
1 t. garlic powder
2 t. onion powder
1 t. dried oregano
1 t. dried basil
1 t. cayenne pepper – less if you a spicy adverse
1 t. black pepper
2 t. smoked paprika
The rest
2 large sweet onions chopped
3 stalks of celery chopped
1 green bell pepper chopped
4 cans of dark red kidney beans drained and rinsed
32 Oz. of vegetable stock
1 cup of light grape juice
2 T. apple cider vinegar
Big pot of cooked rice- you can figure that out
Mix all the spices in a bowl, you can vary the amounts to make any flavor profile along the heat spectrum you like.
In a large Dutch oven on the stove top on high put the onions, celery and green pepper with half the spice mix and cook, stirring every so often for five minutes. Add a cup of stock and continue cooking for five more minutes.
Add the Beans and the rest of the stock and bring to a boil. Reduce the heat a little and cook for 30 mins at just under a boil and above a simmer. Add the grape juice and cook at least another 45 minutes stirring every five minutes to scrape anything off the bottom of the pot. You want it to reduce to a thick beanie gravy.
Add the vinegar right before serving. Put a scoop the beans in a bowl and top with a scoop of rice. YUM
Garden Club Picnic Salad
Posted: May 12, 2015 Filed under: Recipes Leave a comment
I could not remember if I was assigned a salad or a side dish for our annual Garden Club Picnic tonight so I made a vegetable salad that could be consider either.
I had bought a beautiful pound of green beans at the farmers market on Saturday so I just added some other veggies to those.
I made a lemon thyme dressing with our new Vitamix since I feel compelled to use it as often as possible to help amortize the cost of the crazy machine. If you don’t have a Vitamix you can make the dressing in a jar. You will just need to zest the lemon and squeeze the juice out to make it by hand.
Lemon Dressing
2 whole lemons – quartered
¼ c. olive oil
2 T. Champagne Vinegar
4 packets of Splenda
Handful of washed fresh Thyme
Salt and pepper
2 T. water
Put the lemons in the blender and on the lowest setting start chopping them up. Add the oil and water and increase the speed one notch every 10 seconds for three notches. Add the thyme, vinegar, Splenda, a pinch of salt and three turns of the pepper grinder. Run the blender for 30 more seconds.
Put a fine sieve strainer over a bowl and pour the contents of the blender in it. Using the back of a spoon push as much as you can through the sieve. You will have a lot of solids left in the sieve, which you will throw away. Taste the dressing in the bowl and add more salt and pepper if needed. Set the dressing aside.
Salad
1 Pound of green beans – cut in thirds
1 pound of cooked lentils – Traders Joes has them in the vegetable fridge
½ pounds of cooked and shelled edamame
10 small cooked beets diced
½ pound goat cheese
½ c. walnuts
Cook the green beans in pot of salted water for about four minutes and then drain them and run under cold water to stop the cooking. Chill the beans.
Add the lentils, beets and edamame to the chilled green beans and toss with the dressing. After everything is well-coated toss in the crumbled goat cheese and walnuts right before serving.
Coconut In This Salad Is The Bomb
Posted: April 24, 2015 Filed under: Recipes Leave a comment
I made a blanched green vegetable salad yesterday with some shaved coconut and fried onions in it. It was fine then, but today when I went to have the leftovers it was fantastic. The sweetness of the coconut and the tang of the lime had married beautifully with the chili in the salad.
I used broccolini because I found some at Trader Joes, but I have to say it was the disappointing part of the salad, at least the tough stalks. Next tie I might just use the tops of regular broccoli.
Big bunch of Broccoli- lightly steamed and shocked in cold water to stop the cooking
Big bunch of green beans lightly steamed and shocked
Cup of cooked and shelled Edamame
Cup of Cilantro leaves- chopped
¾ cup of chopped coconut – not the flaked sweet kind. I used Trader Joes Coconut sticks that I chopped
1 large sweet onion
1/3 cup of Wondra Flour or rice flour
¼ cup of olive oil –for dressing and more for frying
Juice of 2 limes and zest of one
2 small dried red chilies
1 t. mustard seeds
Make the fried onions first my very thinly slicing the onion and dredging it in the wondra or rice flour. Pour a bit of the oil in a frying pan just to coat the bottom of the pan and heat on medium heat. Use a fork to pick the onions up out of the flour so you shake any excess off the onions and put in the fry pan and cook quickly, turning to keep them from burning. Remove from the pan to a paper towel covered plate and salt while still hot. You make need to fry the onions in batches.
Make the dressing by putting ¼ cup of oil in a small pan with the mustard seeds and red chilies and heat it up on medium. Cook until the mustard seeds burst, about two or three minutes. Mash the chilies with a fork and break them into small bits. Set the oil aside to cool. Add the limejuice and zest when cool and mix well.
Put all the green vegetables in a big bowl and pour the dressing over it. Tossing everything to coat. Add the coconut – It tastes better if it can marinate overnight. Add the onions right before serving.
You can add cooked chicken or shrimp to make it a whole meal.
Spring Chicken Artichoke Lemon Salad
Posted: April 23, 2015 Filed under: Recipes Leave a comment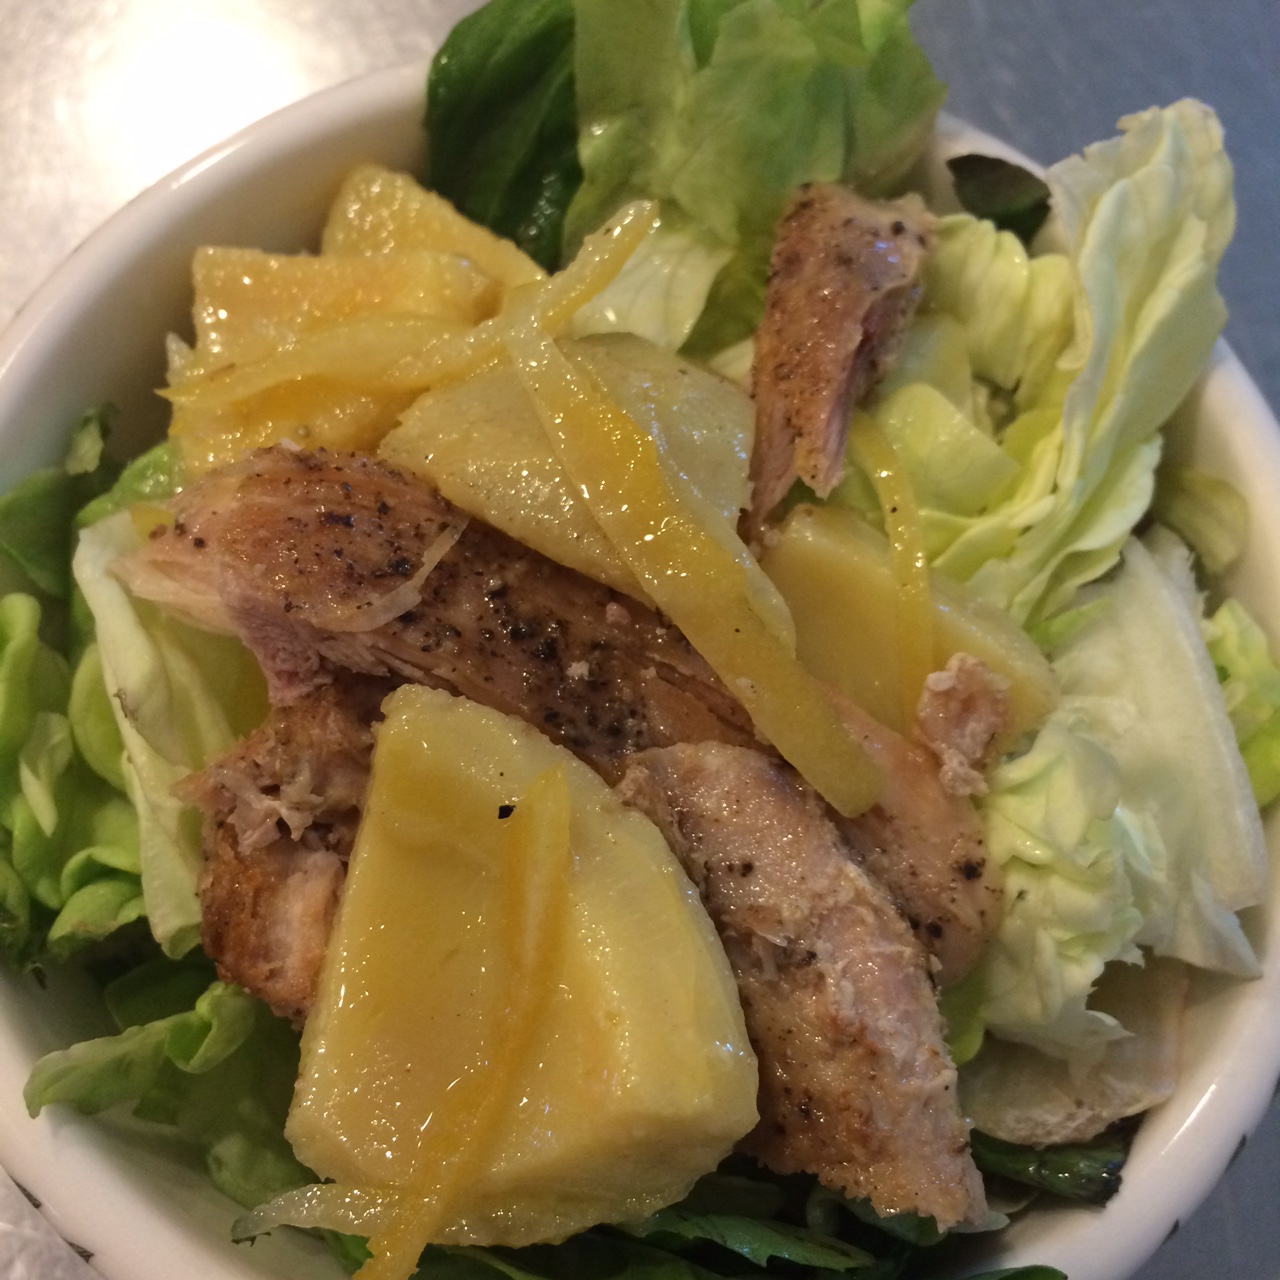
I had a meeting of some women friends at my house today so I used it as an excuse to try some new salads. True to form I could not decide on one salad I wanted to make so I made three. I’ll dole the recipes out over the next few days. Interestingly the simplest one was the tastiest, at least to me — Maybe because I love lemons so much.
I was inspired by a more complicated artichoke recipe that involved cleaning and cutting down fresh artichokes to just their hearts and then cooking them in a complex broth of herbs before dousing them in a candied lemon peal sauce. It seemed like a lot of work when I could just use canned artichoke bottoms, so that what I did. The candied lemon peel was really the star and very easy.
Candied Lemon Peel Sauce
3 whole Lemons
2 T. sugar
2 T. water
Cut the peel off the lemons trying to get just the yellow part, leaving the white pith on the fruit. Once you have cut it off in about ½ inch wide strips cut those pieces into thin slivers. It is easier to do it that way, than cutting it off the lemon in tiny thin strips. Once you have gotten all the skin off the lemon you can squeeze the fruit to remove all the juice and put it in a small saucepan.
Add the lemon peel strips, sugar and water and place on a medium flame on the stove and bring to a simmer and cook for fifteen minutes until half the liquid has disappeared.
Put in a plastic container in the refrigerator. This can be done in advance and kept for weeks.
Dressing
1 whole lemon cut in eights
2 garlic cloves
Big pinch of salt
Black Pepper
1/3 c. of olive oil
¼ cup of Champagne Vinegar
Put the whole lemons, garlic salt and a few grinds of the pepper mill in a heavy-duty blender, like a Vitamix. Starting on the lowest setting start grinding everything up and adding the oil while increasing the speed for one minute. Put a fine sieve over a bowl and pour the contents into the sieve catching the lemon solids and letting the lemony oil go into a bowl. Add the vinegar and whisk together. This dressing is good when used with the candied lemon peel and the liquid that is left with it. If you do not make the lemon peel add a tablespoon of honey to sweeten the dressing.
Salad
4 boneless skinless chicken thighs- cooked and shredded
3 heads of butter lettuce cut into small pieces
30 basil leaves torn up
20 mint leaves torn up
1 can of artichoke bottoms- drained and quartered
2 globes of Burrata- cut in half at serving time and put on each individual serving.
Mix the lettuce, and herbs together and divide onto four large plates.
In a separate bowl toss the artichoke bottoms with the candied lemon peel and the remaining sweet liquid. Spoon over the lettuce. Top with chicken. Drizzle a little dressing on top and lay half a globe of burrata on the side with the cut side up so the creamy center stays in.
Best Bang For Your Buck Black Bean Soup
Posted: February 6, 2015 Filed under: Recipes 2 Comments
My well documented hate of throwing away food drove me to create this recipe back in my catering days to use up the ham that was left on a bone of a Honey Baked Ham spiral cut ham. Later I learned that the Honey Baked store sells ham bones with a ton of meat still attached for something like $5. They keep them frozen so just go in and ask to buy the ham bone.
This recipe is for a huge amount of soup because of how much ham is left on the bone. If you want to make less you can just add some chopped ham instead of using the bone, but it will cost you so much more and won’t have quite the same flavor.
This is not the lightest soup, but it is very filling and satisfying so a small cup will stay with you a long time.
1 half a ham bone with meat attached
5 big yellow onions chopped
10 cloves of garlic minced
3 T. olive oil
8 15 oz. cans of black beans drained and rinse
5 T. ground Cumin
1t. Cayenne pepper- more or less depending on how hot you like food
2T. Garlic powder
1T. Smoked Paprika
2T. Dried oregano
2 T. brown sugar
Juice of 2 Lemons
¼ Cup Sherry
Sweet Red Pepper Chopped
Bunch of flat leaf parsley Chopped
If you get a frozen ham bone you can start this soup by putting the ham in a big stockpot and adding a half-gallon of water and bringing it to a simmer to begin to thaw out the ham and develop the flavor of the water for the soup. If your ham is not frozen just start at the next step.
In a big stockpot put the olive oil and heat on medium high heat. Add the onions and garlic and cook for about ten minutes stirring often. When the onions are translucent add the spices and cook for another two minutes to wake them up.
Add the ham bone and half a gallon of water at this point. If you have already started heating the ham in water add the onions and spices to that pot because it is easier to pour the onions that the water.
Bring the whole thing to a boil and reduce to simmer. Add the beans and cook uncovered for at least an hour to two hours. You want the liquid to reduce and thicken.
When thick take the ham bone out of the pot and let it cool enough to be able to cut any meat off of it.
Add the red peppers, brown sugar, sherry, lemon juice and the cut up meat back to the pot and cook for ten minutes. Taste for spiciness and add any cayenne you want. Add the parsley and serve. Good with Sour Cream
The Red Part of Christmas
Posted: December 22, 2014 Filed under: Recipes Leave a comment
In the 80’s when I lived in Washington DC we used to go to a really fancy Italian Restaurant on King street in Alexandria when we wanted the best Italian food we could find outside of Italy. I can’t remember the name of the restaurant now, but I do remember everything about my favorite dish there, veal cannelloni. I have never experienced a lighter, but more flavorful triple ground veal, spinach and cheese filling wrapped in a thin crepe with both béchamel and marinara sauce.
When my dad requested pasta for his Christmas day lunch my mind went directly to that cannelloni and I began my quest to recreate that meal. I bought a new crepe pan, went to the new Fresh Market to see what the veal situation was and discuss my desire for triple grinding and I purchased six kinds of cheeses. All prep for all these parts of the dish has to wait until at least Christmas Eve, but I could make the marinara today.
Since pasta by itself does not usually make the holiday meal top ten list in our house I wanted to make sure that what I am going to make is Jesus worthy. I studied the recipes of many fabulous Italian cooks and then went to work amalgamating all that I had in my head into my own recipe. I knew that if this version was not perfect I still had time to make other versions.
After cooking for half the day I tasted the product of my study and am writing the results down right now since it was the most superior sauce I have ever made. I did not try and lighten my version, but I must say that any evil ingredients are so small in amount that their inclusion is mandatory. I also used the right tools for the job. I knew there was a reason I owned a food mill.
If you are still searching for something to make over the holiday that will make everyone happy this sauce is a great place to start.
Christmas Marinara
¼ c. Olive Oil
½ pound minced Pancetta
3 large Yellow Onions – chopped
3 large Shallot- minced
8 cloves of garlic minced
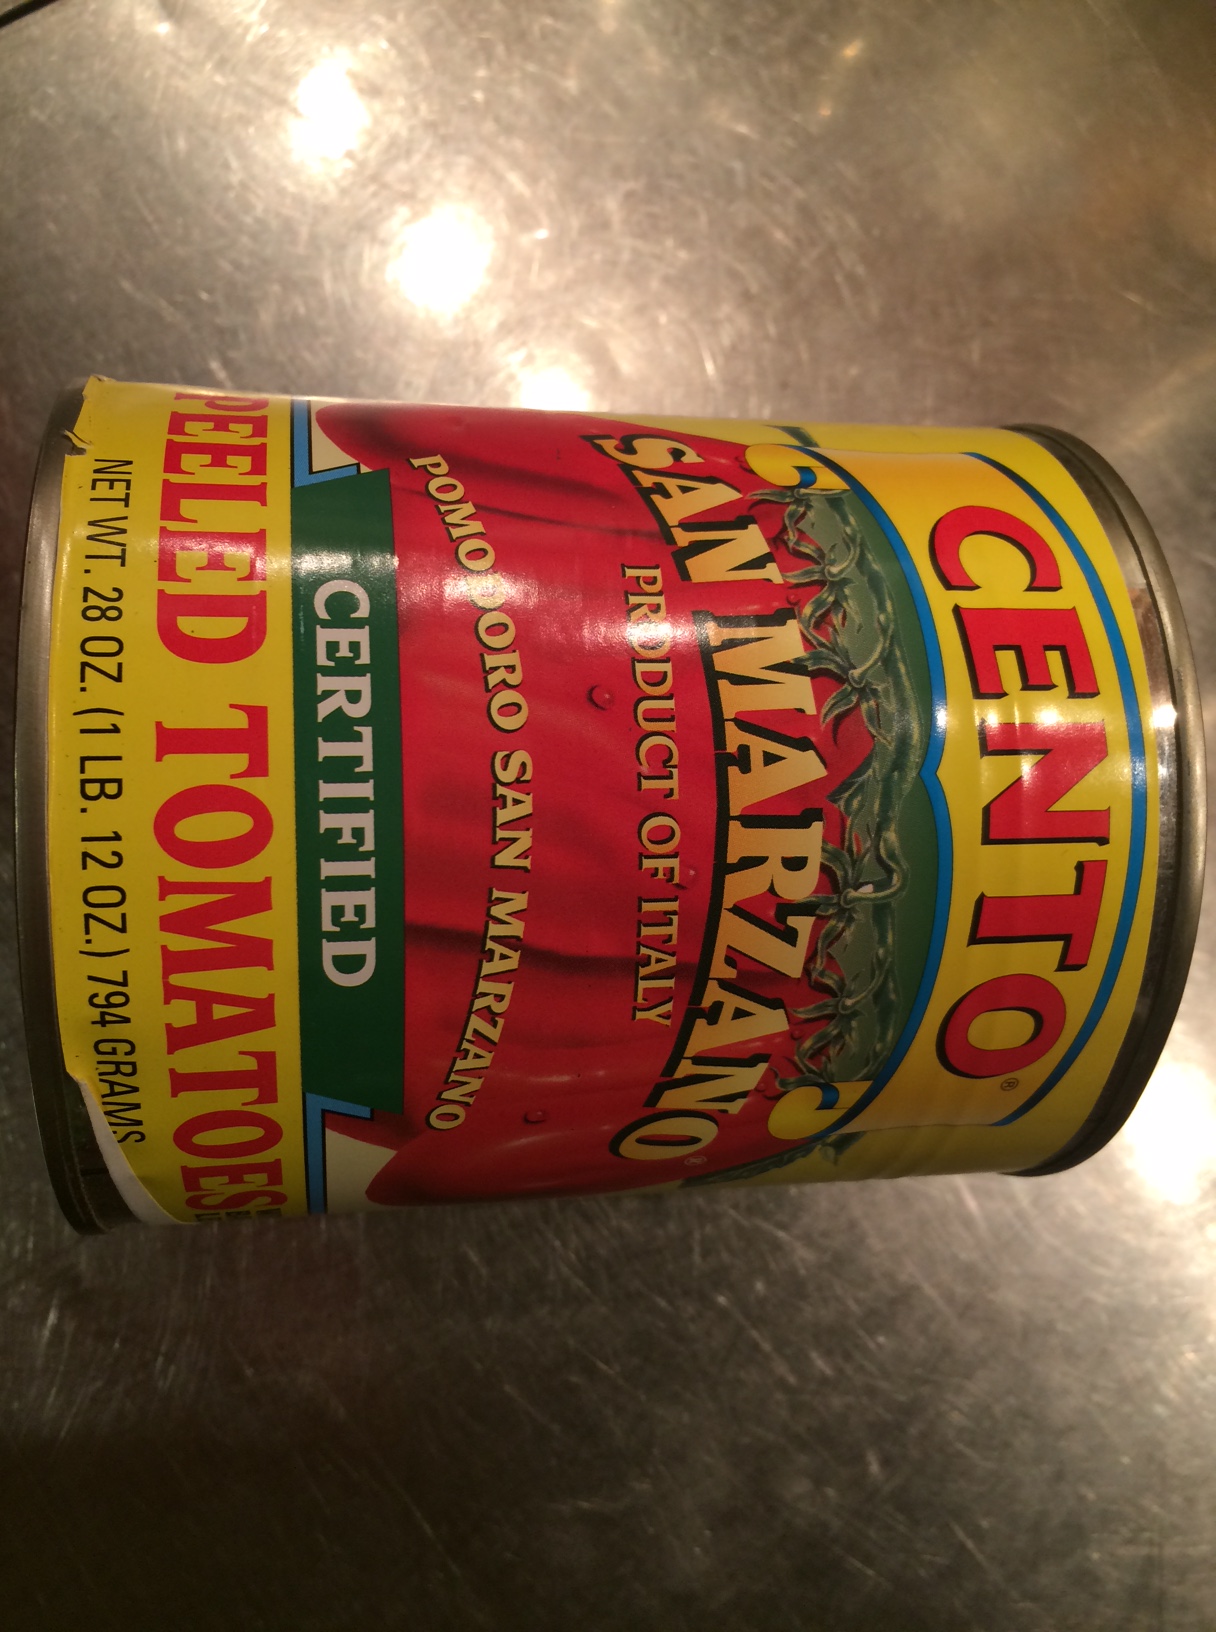
5 – 28 oz. cans of San Marzano peeled tomatoes
Salt
In a large stockpot on medium high heat pour the olive oil and add the Pancetta. Cook stirring every so often for about five minutes. You are not browning the pork, just starting the rendering process.
Add the onions and shallots and stir them around and cook another 8 minutes. Add two big pinches of salt. You do not want to brown the onions, just soften. Then add the garlic, stir and cook three more minutes.
Open all the cans of tomatoes—spring for the Italian ones, Trader Joes sells them for $3.39 a can. Place a food mill over the pot and pour the cans, one at a time into the food mill and turn the crank until all the tomatoes have been pushed through the sieve. At the end of each can scrape the bottom part of the food mill into the pan since that is the really good part. Repeat until you have done all five cans. The food mill will probably still have some seeds and the cores of some tomatoes in it that you will just throw away.
Bring the sauce up to a simmer and add a little more salt. Once the pot is bubbling a little turn the heat down just a bit so that the sauce is just bubbling. You are going to cook this for about three hours, stirring the pot every 15 mins or so.
Taste to see if it needs more salt.
You can keep this sauce in the fridge for about 4 days or freeze it if you are keeping it longer.
Your family will think you have an Italian grandmother tied up in the basement. This is worth the time and effort.
Dana’s Senegalese Chicken Stew
Posted: November 5, 2014 Filed under: Recipes | Tags: Boneless Skinless chicken thighs, butternut squash, coconut milk, peanut butter Leave a comment
OK, I have never been to Senegal and I have no idea why I named this recipe this, but somewhere in some travels I ate once in a Senegalese restaurant and discovered this flavor palate of coconut milk and peanut butter mixed with curry. I liked it and adopted it for American ingredients. Feel liberated when making this and add any vegetables you have on hand.
5 Boneless Skinless chicken thighs- chopped into small ½ inch pieces
2 T. lemongrass paste – in a tube in the veggie section
1-inch finger of fresh ginger- grated
5 cloves of garlic – grated
2 large sweet onions- chopped
5 carrots- peeled and chopped
3 cups of chopped butternut squash
1 red pepper – seeded and chopped
1 small can of tomato paste
1 14.5 oz. cans of stewed tomatoes
2 T. cumin
2 T. curry powder
1 T. coriander
2 14 oz. cans of chicken stock
1 pound of fresh green beans cut in thirds
1 16 oz. can of light coconut milk
½ cup peanut butter
Juice of 1 lime
Salt and Pepper
In a fry pan sprayed with Pam, brown the butternut squash on medium heat for five minutes flipping it so all sides get a little color.
In a big stock pot sprayed with Pam, put the chicken with salt and pepper on medium high heat and cook, stirring every so often for five minutes. Add the onions and the garlic and continue cooking for three more minutes. Add the Carrots and the red pepper, lemon grass and ginger and cook another two minutes.
Add the tomato paste and all the spices and cook for three more minutes. Add the stewed tomatoes, and the chicken stock and the butternut squash and the green beans. Cover and cook for five minutes. Add the coconut milk and peanut butter and cook another two minutes. Add the lime juice and taste for salt and pepper. If you like more spice you can add some siracha at the table.
Ribollita – Tuscan Bread and Vegetable Soup
Posted: November 1, 2014 Filed under: Recipes Leave a comment
Some people accuse me of posting recipes on the blog when I have nothing to say. Anyone who has ever met me knows that I rarely have nothing to say. Sometimes I have too much to say and posting a recipe is keeping me quite, thoughtful and reflective for another 24 hours.
Today is the perfect soup day. It is cold, dark and a good time to be reflective. The best part about Ribollita is that it too is reflective, changing from one day to the next.
2 cups lima beans
2 cups of fresh Dixie peas (or field peas, or black eyed peas) – You can use any white beans to make up the Lima and field peas.
5 slices of thick cut bacon cut into ¼ inch pieces
2 c. chopped onions
5 chopped carrots
3 stalks of celery chopped
6 cloves of garlic – grated on the micro plane
1 quart of chicken stock
5 big handfuls of chopped kale
30 basil leaves chopped- I use a ¼ cup of my frozen basil
Pinch of red pepper flakes
Black pepper
An old baguette cubed into bite-sized pieces
Parmesan Cheese
Put Lima beans in a sauce pan with 3 cups of water and cook them until they are tender, about 15 mins. Do the same for the Dixie or field peas in a separate pan, but they may take a little longer. When those beans and peas are finished cooking take them off the heat but do not discard the water add a big pinch of salt to both pans now.
In a big stockpot put the bacon and cook for five minutes until the fat starts to render. Add the onions, carrots, and celery and continue cooking for five more minutes. Grate the garlic over the pot and cook for one more minute. Add the Chicken stock and the kale and cook for ten more minutes after the whole thing had come to a boil.
Add the basil and lots of black pepper and a few red pepper flakes.
Take half the cooked beans and peas out of the water and puree them with a hand blender. Add the puree to the pot and then add the remaining whole beans and peas. The mixture will be very thick. Thin it out using the bean and pea cooking water. Add as much bread as you like knowing that it will soak up the liquid so you may need to add more bean/pea liquid. Cook for ten more minutes.
Serve with a big heaping spoonful of Parmesan Cheese over the top.
Cranberry Ginger Trifle
Posted: October 16, 2014 Filed under: Recipes Leave a comment
From my post yesterday I had quite a few requests for this recipe. Since I spent the day cooking and throwing a party and the last hour washing dishes I figured it was OK to post a non-healthy dessert recipe just this once.
Cranberry Ginger Trifle
2 12 oz. bags of fresh cranberries
1 cup orange juice
1 ½ cups white sugar- this makes it very tart and not sweet . Add more sugar if you don’t like things too sour.
2-inch piece of fresh ginger grated on a micro plane
2 8 oz. pkg. cream cheese
¼ cup of brown sugar
1 t. vanilla
2 cups of heavy cream
2-pound cakes – cut into ½ –store bought is fine, I used homemade lemon cake I had left over from a coffee I threw last week and put in the freezer just for this purpose inch layers
In a big soup pan put cranberries, 1 ¼ cups white sugar, ginger, orange juice and ½ cup of water. Bring to a boil and reduce to simmer until the cranberries have popped, about ten minutes. Remove from heat and let cool completely
Using a mixer beat the cream cheese with the brown sugar and remaining white sugar and vanilla. After it is well mixed start pouring in the cream and keep beating on high until soft peaks form.
Using a large trifle bowl layer one third of the cake, cover with cranberry and then cream and repeat with another layer two more times.
Chill at least three hours, but it is better done the day ahead.
Pineapple Ice Dream
Posted: October 12, 2014 Filed under: Recipes Leave a comment
There is nothing as disappointing than a not ripe fresh pineapple. After all the work of cutting away the kin and coring the yellow fruit to find that it is still too tart and not that tropical sweet juicy flesh you were craving is a let down.
So what to do with the tart useless chunks, but turn them into a Pineapple whipped dessert.
1 cup frozen pineapple chunks
2 T. fat free half and half
¼ c. non-fat milk
Splash of almond extract
1 Splenda packet
Put everything in an ice-cold container and using a stick blender whirl until a smooth frothy liquid. Place in the freezer and chill until not quite frozen through, at least an hour. Enjoy as if it is pineapple ice cream and curse the pineapple purveyors who sell such unripe fruit.
It’s A Meal Cauliflower Soup
Posted: October 6, 2014 Filed under: Recipes | Tags: cauliflower 1 Comment
At last the weather has been cold enough to jump-start my desire for soup. I love soup all year long, but there is something about the first cold snap that makes me happy to just have a big mug of soup for dinner.
Maybe it was from the years we lived in London. Cold and usually wet were the weather of most days. Since Russ and I worked many hours a day there was not a lot of cooking going on. We came to depend on the Covent Garden Soup stand in Euston station that was conveniently next to our office in Grant Thornton House. I can’t remember all the soups we used to get, but I can say we never had a bad one. What I learned from them is that soup could be satisfying as a meal unto itself. Of course they also included a hunk of crusty bread to eat with our soup, but even forgoing that today I was happy with this concoction.
3 Slices of think cut bacon cut into lardons
1 large sweet onion chopped
4 coves of garlic minced
2 carrots peeled and chopped
1 head of cauliflower broken into florets
1 qt. of chicken stock
6 springs of fresh thyme tied together with kitchen string- or two dashes of dried thyme
1 cup of milk
¾ cup of grated Gruyere cheese
Dash of cayenne pepper
Black pepper
Put the Bacon in a stockpot and cook on medium high heat until almost crispy. Pull the cooked bacon out and set aside leaving the bacon grease in the pot. Add the onion, garlic and carrots and cook for five mins. Add the chicken stock and bring to a simmer. Add the cauliflower and thyme, reduce heat to simmer and cover. Cook about 15 minutes or until the cauliflower is soft.
Remove from heat and fish out the fresh thyme if used. Using a stick blender puree the soup adding the milk to ensure you have enough liquid. When smooth add the cayenne and lots of black pepper and the cheese.
Serve with a few of the bacon lardoons on top.
Eat and imagine you live in London.
Fennel, Orange and Grape Salad
Posted: September 21, 2014 Filed under: Recipes 1 Comment
In the use-up-what’s-in-the-fridge mentality today we all ended up eating different things for dinner. Russ is always the best sport about taking the oldest leftovers for himself. Carter opts of Asian as is her constant preference and I look around at what I have to chose from the ready made dishes and decide to make something new.
Staring me in the face are two fennel bulbs that are in the use them or lose them category. So fennel it is. As a child I hated all things that had to do with anise or black licorice, but my grown up palette now loves fennel.
2 fennel bulbs sliced very thinly
2 oranges cut into segments
1 red onion thinly sliced
25 black seedless grapes – halved
2 T. red wine vinegar
1 T. limejuice
1 T. olive oil
4 packets of Splenda or 1 T. honey
Salt and pepper
Blue cheese crumbles to sprinkle on top
Mix the fennel, onion, grapes and oranges in a big bowl. Mix all the other ingredients, except the blue cheese, together and pour over the salad. Toss it up. Sprinkle the blue cheese on the individual servings just before eating.
Red Relish Short Ribs
Posted: September 14, 2014 Filed under: Recipes | Tags: short ribs Leave a comment

In an effort to use items in my pantry I am making up recipes that use unusual ingredients together. I had a package of short ribs and I did not want to ruin a lot of really good meat, so I looked carefully at my stash. I have an inherited trait of saving expensive things past their usefulness because I don’t feel worthy of using them.
I know I get this from my mother. My father talks about buying my mother some really beautiful dresses from The Little Shop in Chapel Hill when they were students and first married. My mother only had one dress and two skirts and blouses before my father went wild buying her expensive clothes. My father was sure he was saving himself from having to see my mother in her same old and well-worn clothes.
The day after he bought the dresses my mother put on her old outfit prompting my father to ask her why she was not wearing a new dress. “It’s too good to wear so soon.” Years later my father is still mad that she did not throw her old clothes away and just wore the new clothes. That trait has never left my mother.
As I looked in the pantry at my stock of ingredients I noticed a jar of Stonewall Kitchen Red Relish that a houseguest had brought me as part of a larger gift basket. I don’t know what I was saving it for, so I decided today was the day to open it and use the whole thing. With it’s red peppers, onions and vinegar it was perfect with the rich short ribs.
8 big beef short ribs
2 large softball sized sweet onions sliced
Head of garlic- minced
1 16 oz. jar of Red Relish
1 Cup of strong Coffee
1/2 C. Ketchup
¼ c. Worcestershire sauce
3 T. fish sauce
Salt and pepper
Preheat the oven to 300 degrees.
Put a large Dutch oven on the stove on high heat. Spray with Pam. Liberally sprinkle salt and pepper on all sides of the Beef. Without crowding the pan, put the beef in the hot Dutch oven and brown on all sides. You may have to do this in batches.
Set the meat aside after browning and add the onions and garlic to the pan, which probably has some fat in it. Cook on medium for five minutes stirring to loosen any brown bits that had been created from browning the meat. Add all the other ingredients and bring them to a simmer. Add the meat back in and cover the Dutch oven and place in the hot oven. Cook for 3 hours. Using a dry paper towel, soak any accumulated fat off the top.
I served with pureed cauliflower instead of potatoes to help lighten the calories..
Summer’s Almost Over Peach ‘Faux” Shake
Posted: September 10, 2014 Filed under: Recipes | Tags: peaches Leave a comment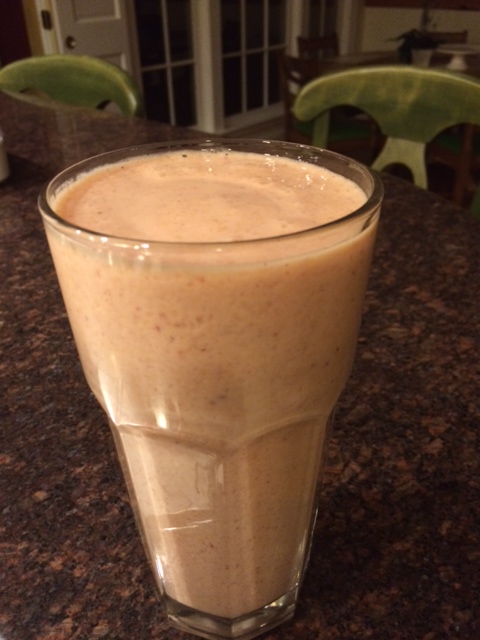
I love fresh peach ice cream. It is one of the summer treats I let myself taste once during the season, except not this year. I splurged on other things so I had to hold back on a few regulars, and peach ice cream was it. As the summer peach season is coming to a close I find I am craving that treat so I took one of the two ripe peaches I have left and tried to make a healthy version of a milkshake to curb my ice cream desire. Of course it’s not the same in the creaminess department, but it was still good in the peachy arena.
1 peeled and sliced ripe peach
1 cup of milk
2 Splenda packets
Splash of almond extract.
I froze the peaches after slicing them. Then I put the milk, Splenda and almond extract in a metal container and put that in the freezer for thirty minutes. I added the frozen peaches to the milk container with a half-cup of crushed ice and using the stick blender whirled the whole thing up. It was cold, peachy and probably will hold my peach ice cream craving at bay until next summer.
Faux Peach Cobbler
Posted: September 4, 2014 Filed under: Recipes | Tags: almond, ginger, peaches Leave a comment
I had a couple guests coming for a working lunch at my house today. I felt like they deserved more than my regular salad for lunch. I looked around my kitchen and noticed a couple of peaches that were ripe. Cobbler, but I did not want to add any white flour to my day so here is what I made up. It actually was quite tasty.
2 big ripe peaches- peeled and cut into chunks
5 splenda Packets
½ t. almond extract
½ cup almonds
1 egg
1 T. melted butter
1 T. milk
pinch of salt
2 T. minced crystallized ginger
Preheat oven to 350.
Put the peaches, 2 packets of Splenda and the almond extract in a bowl and mix up.
Put the almonds in the food processor and chop them up to a powder. It will take about 30 seconds. Don’t run them too long, you do not want it to turn them into butter. Put the almond “flour” in a bowl and add the egg, butter, milk 3 Splenda packets and salt and mix together.
Spray four small ramekins with pam. Spoon a quarter of the peaches into each dish and then spoon a quarter of the almond mixture on top. Sprinkle the crystallized ginger on top of each. Place in oven for 20 minutes.
Can be eaten at any tempreture.
Asian Baby Eggplant Salad
Posted: August 30, 2014 Filed under: Recipes | Tags: baby eggplant 1 Comment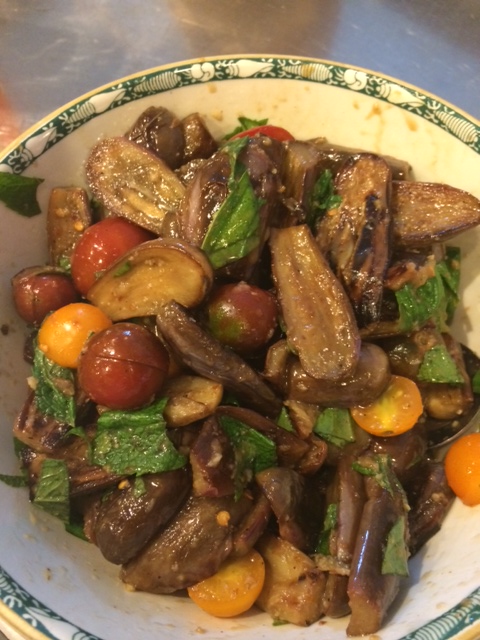
Today at the farmers market there were these beautiful tiny purple and white eggplant. Not having any idea what I was going to do with them I scooped up two pints and brought them home along with six kinds of tomatoes, corn and lots of other end of summer yummies.
I have been eating a lot of tomato and mozzarella or tomato and goat cheese salads so I wanted to prepare the eggplant in a flavor profile other than Mediterranean. SO what could be better than something with fish sauce? Since I was hungry I also wanted to make something fast. Turned out to be both easy and delicious all the while remaining healthy. Win, win, win.
20-baby eggplant – halved
1 T. olive oil
20 cherry tomatoes- halved
20-mint leaves- chopped
20 basil leaves- chopped
Dressing
Juice of two limes
2 Tb. Fish sauce
3 splenda packets
3 dried red chilies – or you can use a ¼ teaspoon of red pepper flakes
2 cloves of garlic
1 T. olive oil
2 T. fresh ginger-grated
1 T. soy sauce
Heat a non-stick fry pan up to medium high heat and add olive oil and the eggplant. Sautee until golden brown and soft, stirring often. This will take about three minutes.
In a blender or using a stick blender mix all the ingredients for the dressing and whirl until the garlic and the chilies are finely minced.
Mix everything together in a bowl and let sit for a few minutes sot he flavors can marry. Can be served at any temperature, but will be even better then next day..
Padron Peppers- The Best Salty Snack Your Hips Will Love
Posted: August 16, 2014 Filed under: Recipes | Tags: padron peppers 2 Comments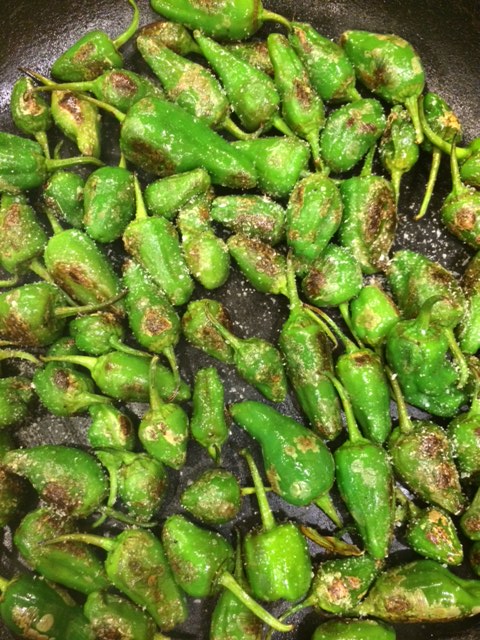
One of the hardest things about trying to eat healthy all the time is there just are not that many good for you salty snacks. I know people think popcorn is a good choice, but some how on me it adds pounds.
Turning to veggies as snacks is the answer, but they are not always fast and sometimes they just feel like the punishment tray when you have to stay away from the crispy or fried snacks.
A few years ago we discovered these little peppers that are in season right now and they are the snacking answer. When I can get them I buy as many as I can find since they are easy to make and yummy to eat.
Padron Peppers
Salt
Pam
Heat a skillet up on the stove so it is hot, hot, hot. Spray it with Pam and fill that thing up will the peppers. You want to cook them hot and fast so they blister and turn brown. I use the flick of the wrist technique to flip them around in the pan, but it you have not mastered that move just stir them every so often. After about 4 mins. sprinkle them with salt and serve.
TO eat them you pick them up by thee stem and bite the pepper off the stem. They are usually not too hot, meaning spicy, but once in awhile one will really give you a little zing.
Tanda Tula Chicken and Cabbage
Posted: August 14, 2014 Filed under: Recipes | Tags: cabbage, chicken, red peppers Leave a comment
Breakfast in South Africa was probably my favorite meals. I’m not sure if it was because I was eating more than my normal cereal and fruit so the excitement my taste buds were getting was making me giddy, or if it was that we ate breakfast at ten in the morning after having spent three and a half hours out looking at beautiful animals. Whatever the reason I had some really tasty stuff in the mornings. The only sad thing is that none of the offerings were repeated. Yes, it was good to try new things, but if I really liked something I did not have an opportunity to try it again and figure out how to recreate it stateside.
One item I really liked was an unusual dish for breakfast, chicken and cabbage. Although red peppers were not in the name they played a major role in the dish. Last night I tried to recreate it for dinner and even if I missed some ingredients Russ and I ended up liking what I made. It is incredibly simple and fast and healthy.
6 boneless, skinless chicken thighs- chopped into bite-sized pieces
1 sweet red pepper – seeded and chopped into bite sized pieces
1 10 oz. bag of shredded cabbage
Lots of salt and Pepper
Heat a big non-stick skillet up on high. Add the Chicken and salt and pepper it and cook stirring often for about five minutes. Add the red peppers and continue cooking for another minute until they start to get soft. Add the cabbage and continue cooking and stirring for another two minutes. Salt and Pepper the whole dish again.
Serve with rice if you want a starch.
Spicy and Cool Watermelon Soup
Posted: July 27, 2014 Filed under: Recipes | Tags: watermelon Leave a comment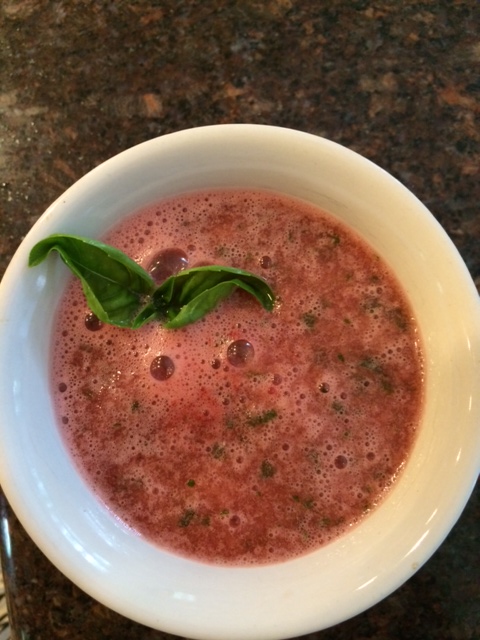
On my way home from Washington I bought a watermelon for a dollar from some kids in southern Maryland. Of course I never got around to using it and here we are on the cusp of leaving for vacation. There is no better way to use up leftovers than soup. The whole watermelon may not exactly be a leftover, but a lot of what went in the soup was.
6 cups of watermelon –deseeded
25 mint leaves
10 basil leaves
1 inch of fresh ginger- grated
1 whole jalapeño- I left the ribs and seeds in for spiciness, but you can cut them out if you want.
¼ c. limejuice
2 big pinches of salt
Put everything in a blender and whirl it on up until all the herbs are pureed. Chill and enjoy.
Pears are Out –Peaches are In Daily Salad
Posted: July 20, 2014 Filed under: Recipes | Tags: peaches 1 Comment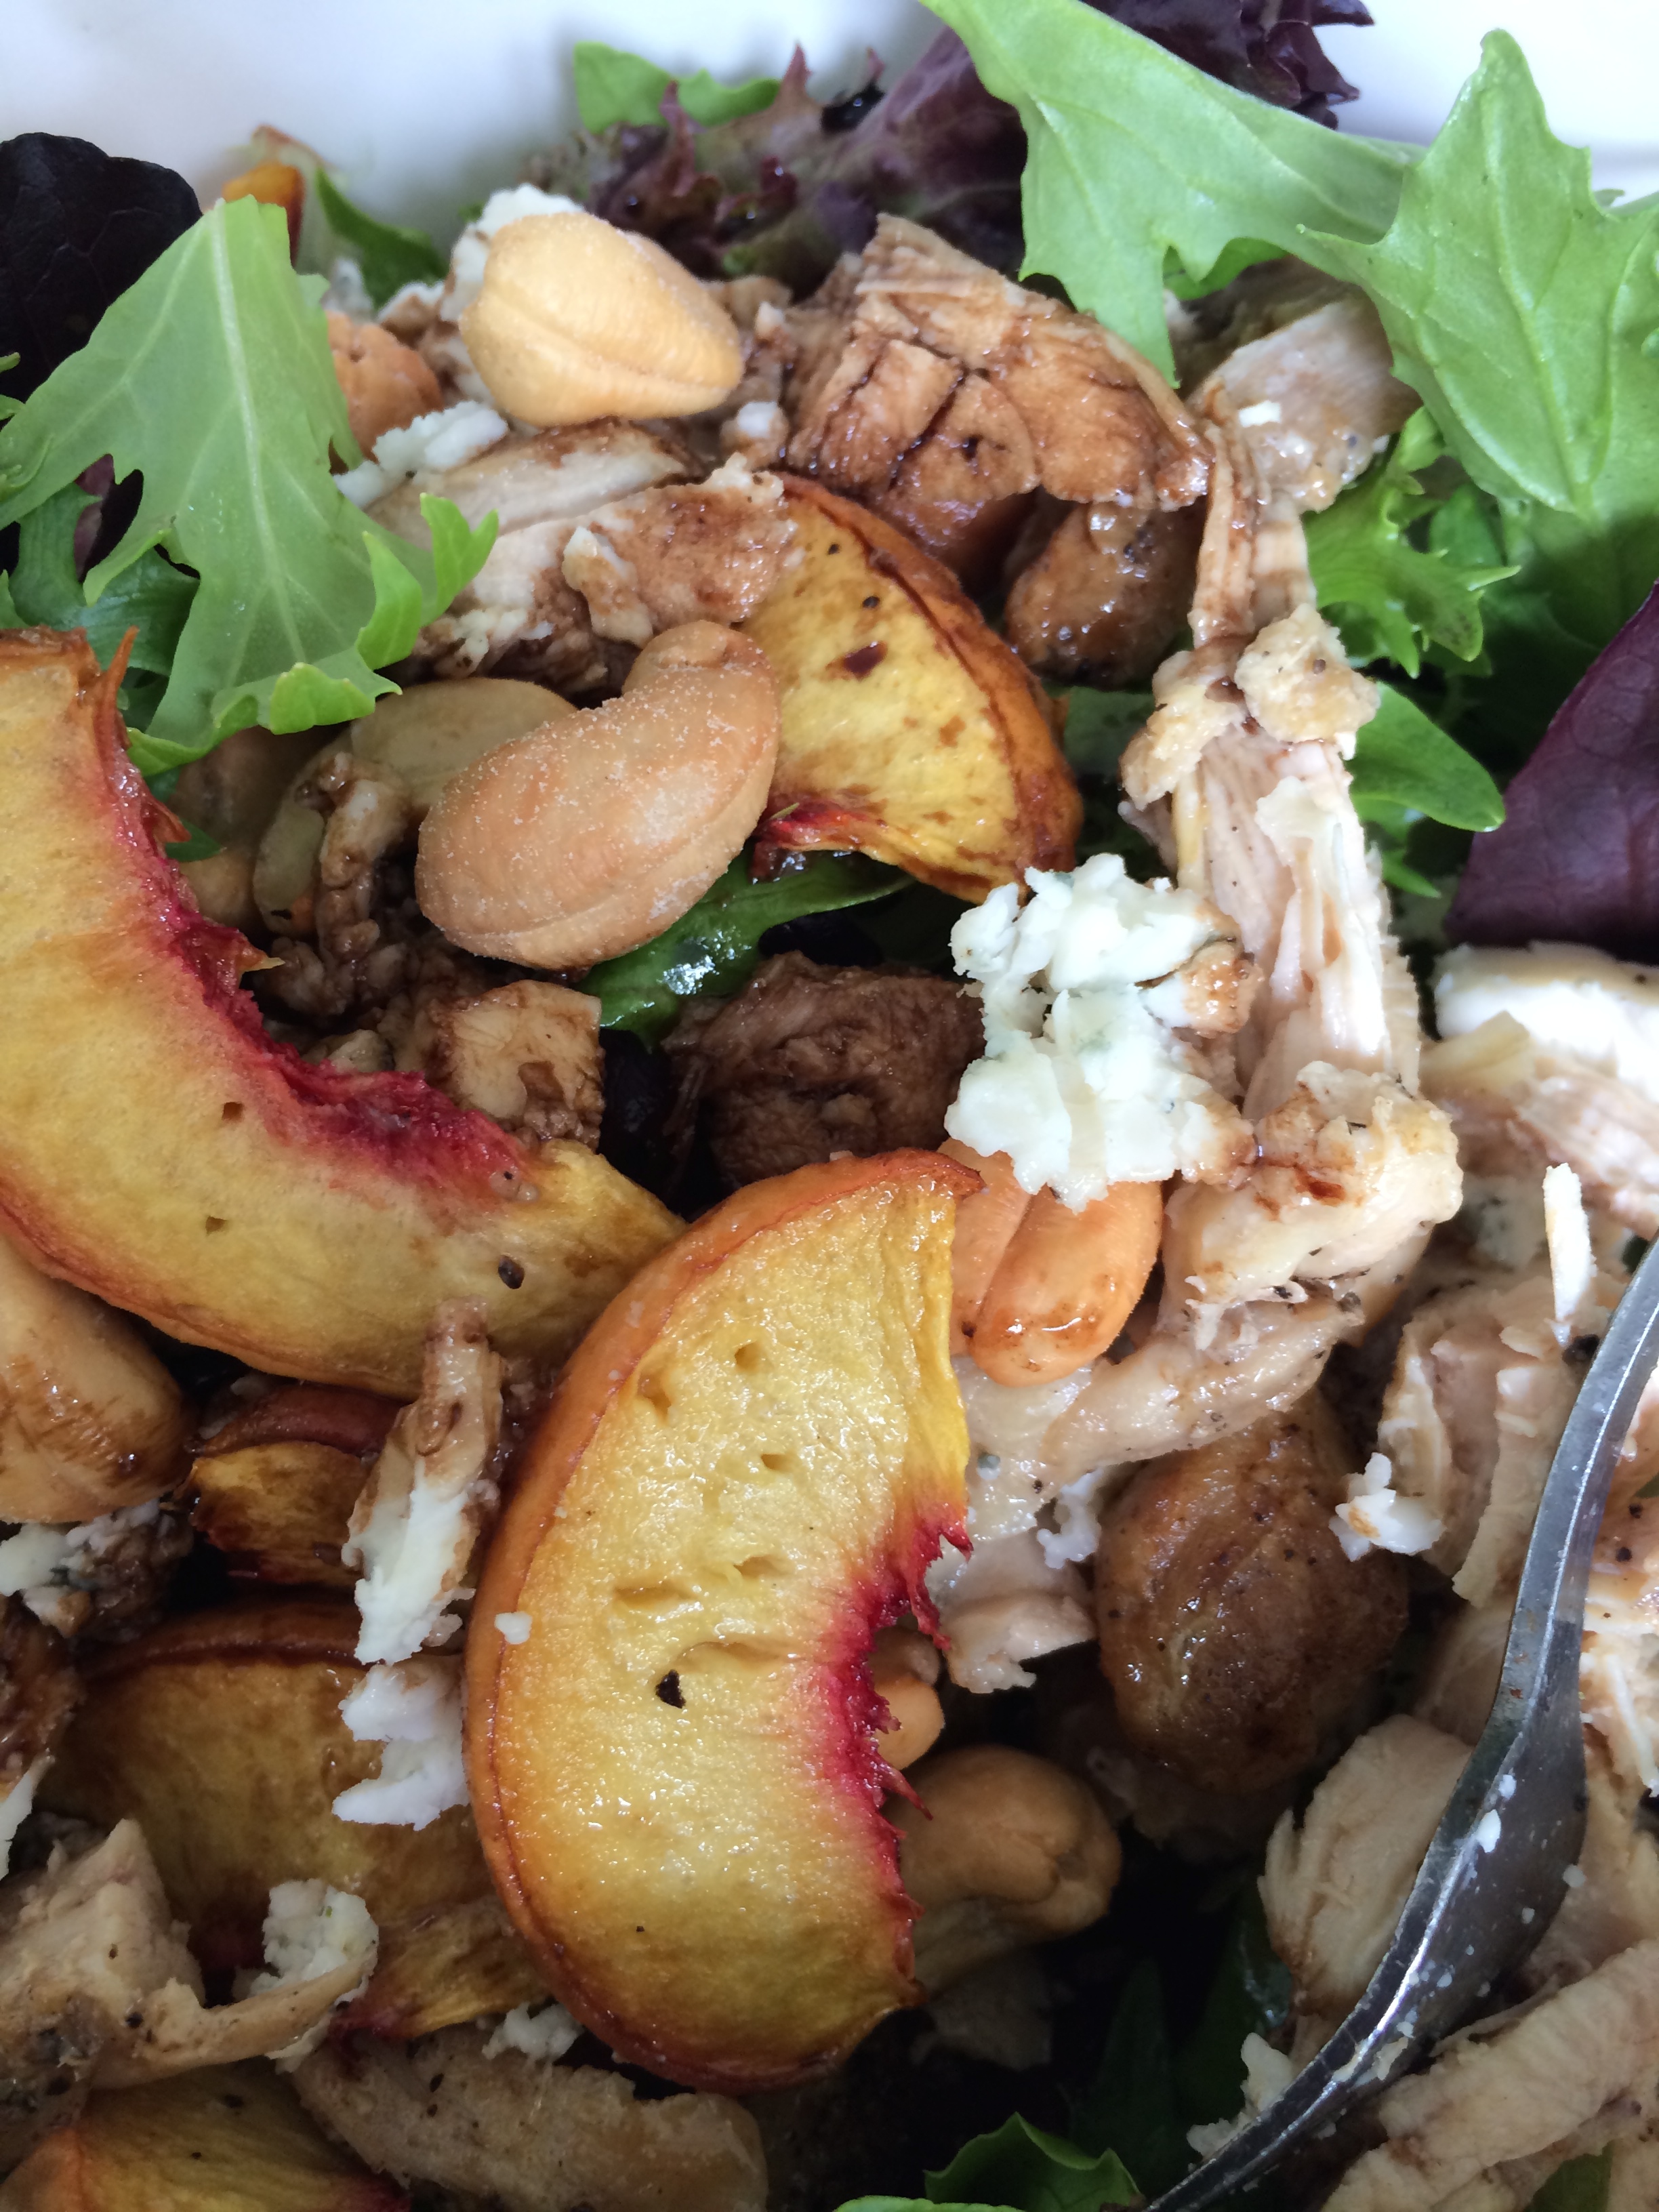
Most days I am home for lunch I eat a salad for lunch. I have a standard favorite of arugula, chicken, caramelized pears and blue cheese. Since it is not pear season and peaches are cheep and abundant I decided to see what caramelized peaches would be like. In a word, YUMMY.
I took two peaches and cut them down the middle and pulled the pit out. Then I sliced them into ¼ inch slices with the skin on. I lay them on a foil covered cookie sheet sprayed with pam. I put them in a 250-degree oven for 30 mins. I could have left them in a little longer to dry them out a little more, but I was ready for lunch so I ate them and thought that they were a great addition to my lunch. Balsamic vinegar goes perfectly with peaches so I had just the right amount of sweet and tart in the salad. I also added a couple of cashews for crunch and now I have a new craving.
Lose the Vacation Weight-No Shell-Fish Taco Salad
Posted: July 10, 2014 Filed under: Recipes | Tags: cabbage, fish Leave a comment

Perhaps the longest recipe title so far, but it explains it all. I gained two and a half pounds on vacation and lost half of it on my first full day back. Getting right back on the wagon is the only way to do it. I have to break myself of sugar craving since desserts are my downfall and I certainly ate plenty of yummy treats while I was away.
One strategy is that I bought many kinds of fruits right when I got home, cherries, cantaloupe, mangos, raspberries and blue berries to help wean me off processed sugar with natural sugar. I have to be carful not too eat too much fruit since it too has calories, but it does a good job to make me forget cakes, tarts, cookies and puddings.
The other strategy is to eat filling, crunchy, full flavored foods. This salad satisfies all those things and Russ likes it as well. – This will make four servings
Half a head of green cabbage- shredded
3 green onions chopped
Big handful of chopped cilantro
3 T. red wine vinegar
3 packets of Splenda
2 T. lime juice
Salt & pepper
Mix all these things together and set aside. This will be the base of your “Taco Salad”
Four 4 oz. pieces of codfish or any other white fish
Wondra – best flour for coating fish
Salt and Pepper
Pam
Mix a ¼ cup of Wondra in a small bag with lots of salt and pepper. Put the pieces of fish in the bag one at a time and shake it around until the fish is coated.
Heat a non-stick fry pan on high and spray with Pam. Add the fish to the pan and cook on one side for two minutes until browned. Spray the top of the fish with Pam and flip it over cooking it another two minutes. If you are using Cod and it is a thick piece of fish turn the fish a quarter turn and brown the sides for about 30 seconds each side.
Toppings for the Salad
Chopped Avocado
Pica De Gallo
Quesso Fresco
Put the cabbage mixture on a plate, lay a piece of fish on top and sprinkle with avocado, salsa and cheese.
First Day of Summer Layered Salad
Posted: June 21, 2014 Filed under: Recipes Leave a comment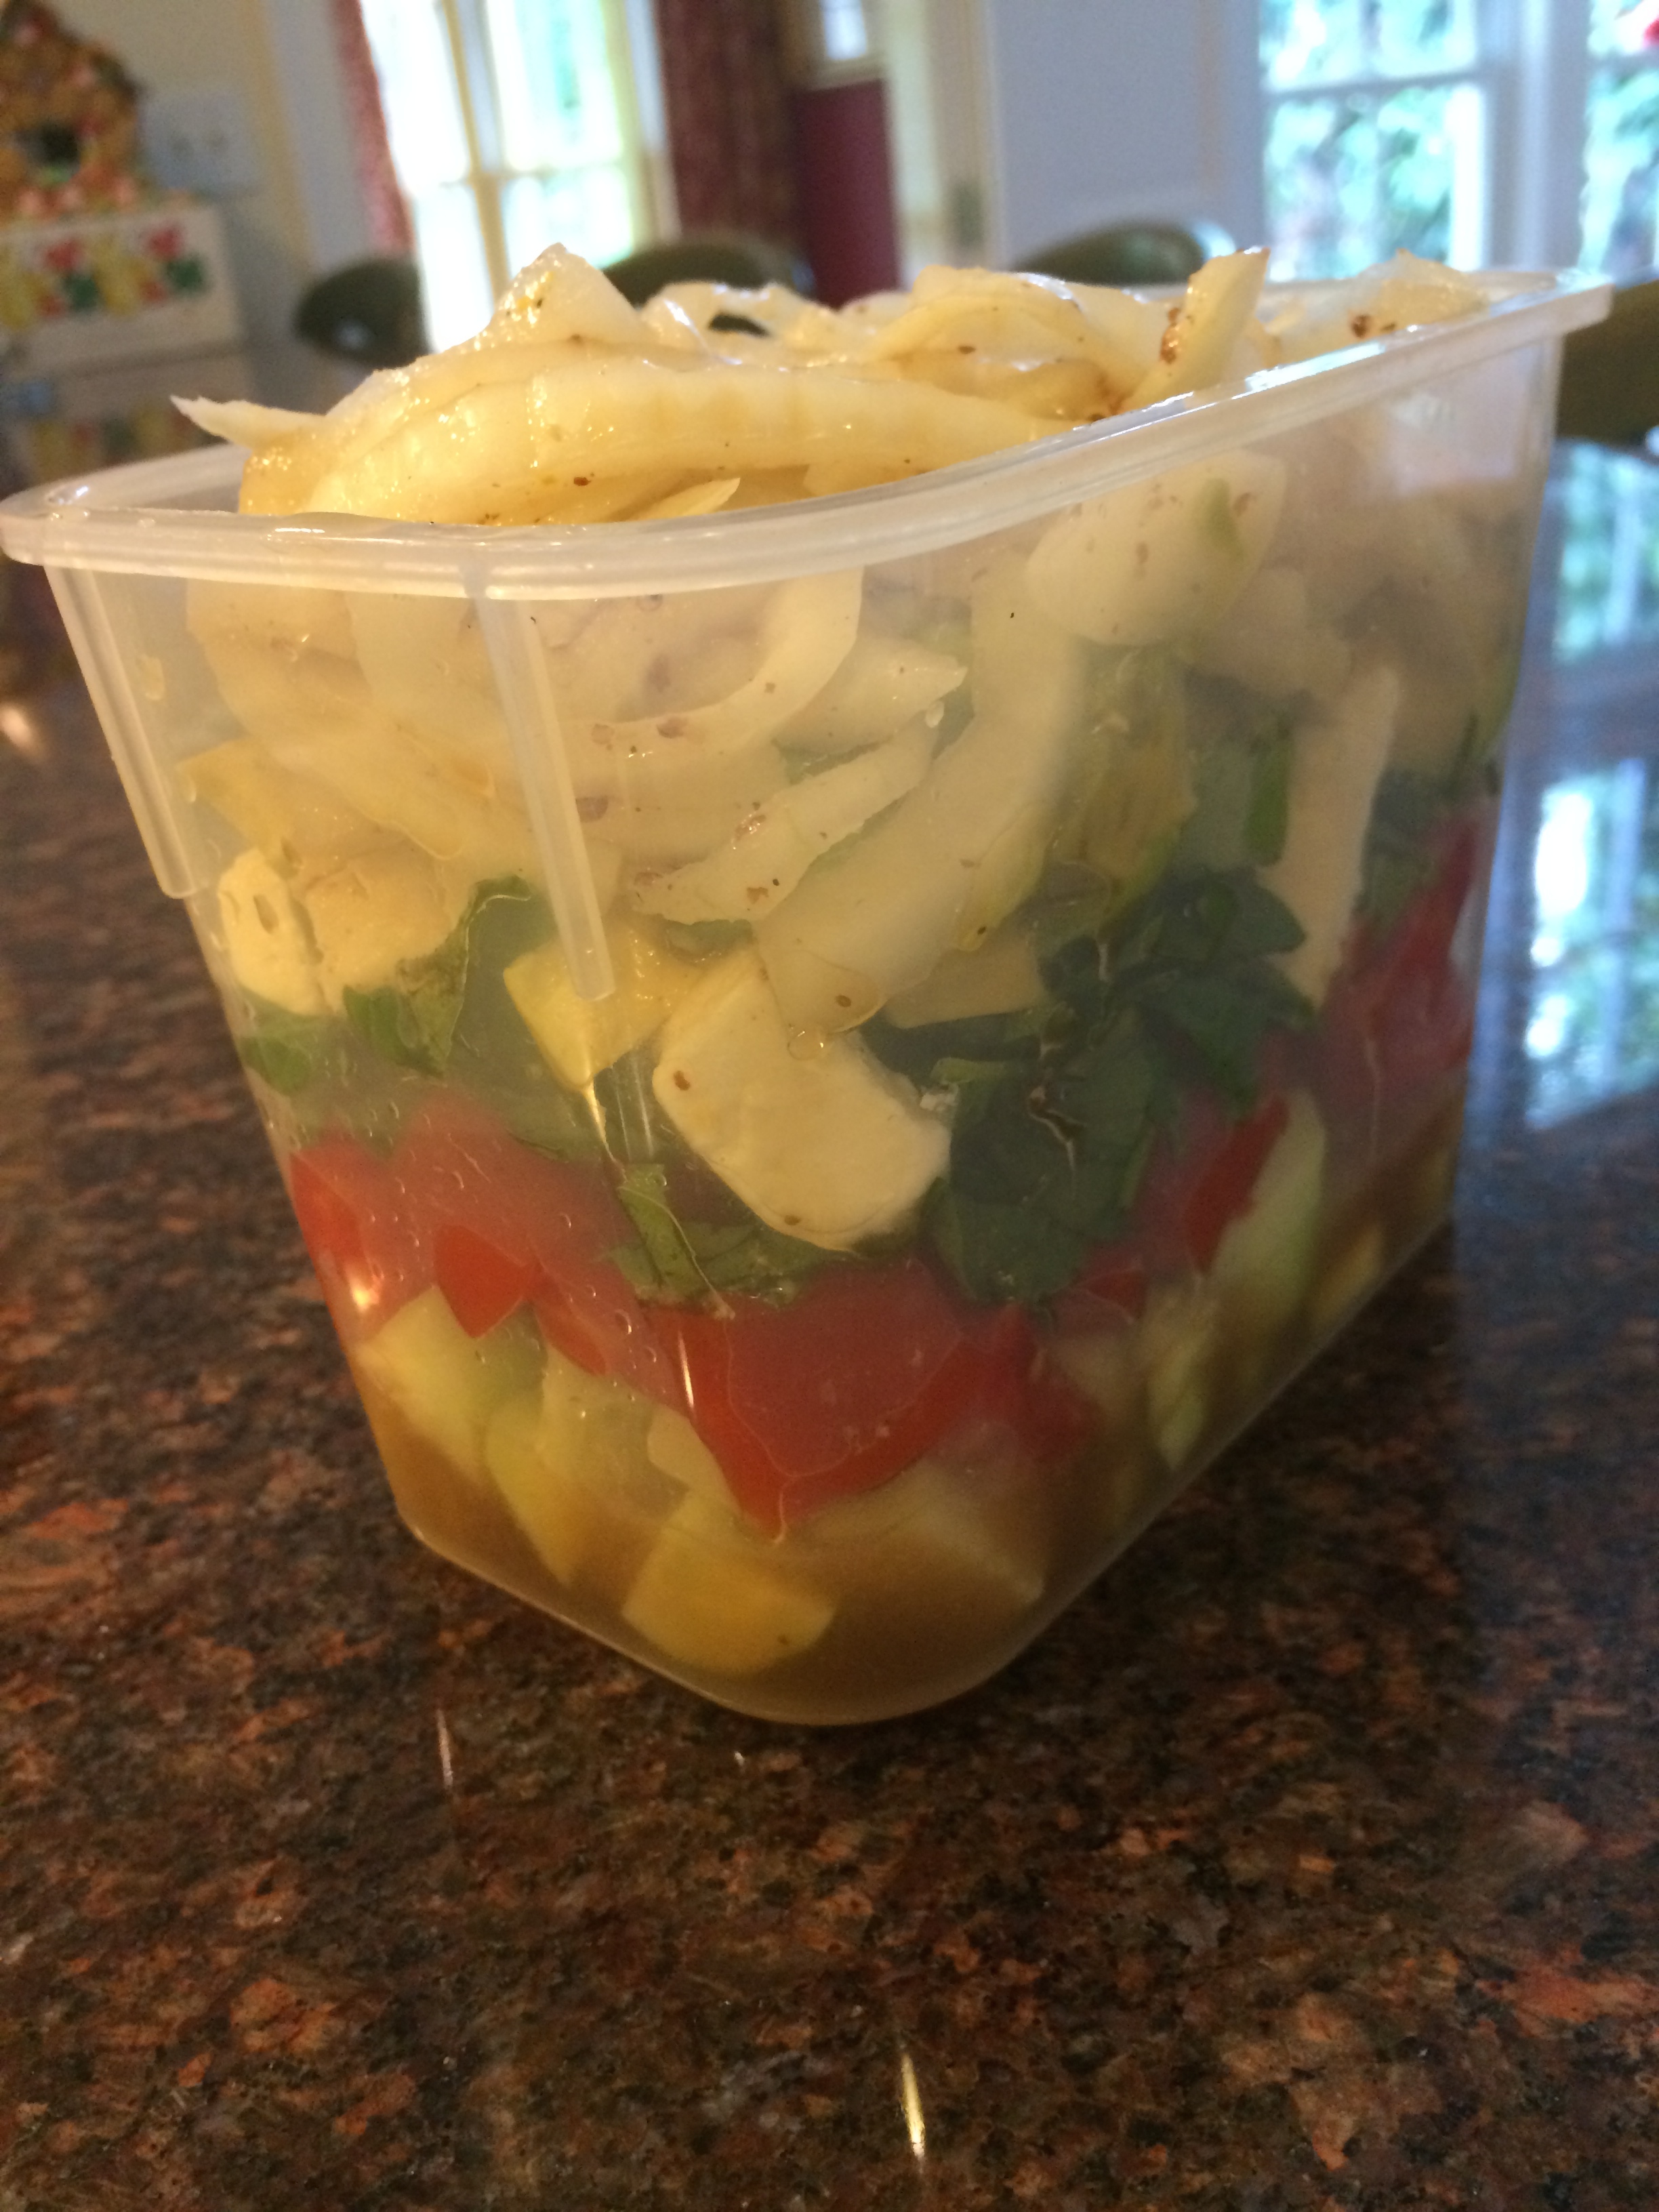
Finally one of my many cucumber vines produced a life size fruit this morning. Since it is Carter’s last night at home before five weeks of Camp Cheerio she is requesting Asian Food. I am trying to stay away from Asian since the sodium seems to stick with me for days. So I made this summer layered salad with the fruits of my garden and what I had on hand.
Starting at the bottom and working my way up to the top this is what it is.
1 Peeled and chopped cucumber
1 chopped tomato
10 Fresh Basil leaves – cut into strips
¼ cup of feta cheese cubes
1 avocado- cubed
¼ cup of marinated onions – I used the leftovers from the onion slaw
Pour some white balsamic vinegar (I used a honey ginger one from Blue Sky), in and chill.
It will need salt and pepper when you eat it, but I did not want to add the salt until right before serving.
As far as I am concerned this will make a meal.
Enjoy the longest day of the year.
Vidalia Onion Slaw
Posted: June 14, 2014 Filed under: Recipes | Tags: Vidalia Onions Leave a comment
In preparation to go to Africa I am trying to use up the food we have in the house and not purchase more perishable goods. That is hard since it is prime veggie season and what I have on hand may make strange food combos. Looking around I notice I have a giant bag a Vidalia onions. Onions usually last a while, but not the sweet kind. I wonder if it is the high sugar content that makes them get soft faster?
Since tomorrow is father’s day I am going to cook some kind of pork being the freezer has a few choices in the hog section. Thinking ahead I to make up some kind of Vidalia slaw that will need a few hours of marinating to make it the perfect mate to a pork roast. All that being said, I have concocted this recipe and tasted it in the pre-marinating state. I may adjust it tomorrow and if I do I will be sure to update the recipe.
2 soft ball sized Vidalia, or other sweet onions thinly sliced
8 packets of Splenda
1/3 c. of white vinegar
3 T. Grainy Creole mustard
½ t. salt
¼ t. celery seed
Black pepper
Mix it all up together and put in a jar or other container that has a tight lid. Refrigerate at least 8 hours.
The time should help soften the onions.
Spinach Soufflé
Posted: June 5, 2014 Filed under: Recipes | Tags: cheese, eggs, souffle, spinach 2 Comments
As a child I used to love to eat soufflé. We had it often thanks to the good folks at Stouffers. Frozen foods were never shied away from back in the seventies. No one in my house ever made a soufflé so I did not learn to make one myself until Julia Child taught me at a cooking class at the Greenbrier. A day spent in the kitchen with Julia is still one of the great days in my life.
Since make a cheese soufflé with her I quickly learned that any cooked vegetable that has been either chopped or pureed finely enough could be added to the base of a soufflé. The other night I had a big bag of spinach that needed to be consumed. I cooked the leaves up in a big fry pan with the tiniest amount of water then squeezed it as dry as I could get it and chopped the hell out of it. Of course frozen chopped spinach cooked and drained well would work just as well for this recipe.
1 c. cooked spinach – if using fresh you need at least 2 pounds or one 10 oz. box of frozen
2 T. butter
½ c. Parmesan cheese
3 T. flour
1 c. scalded milk
Pinch of nutmeg
Pinch of cayenne pepper
Salt and pepper
4 egg yolks at room temperature
1 c. shredded cheese- I used Jarlsberg
5 egg whites
Preheat the oven to 400 degrees.
Spray the inside of a soufflé dish with Pam and sprinkle ½ the Parmesan cheese in the container and twist it around so the cheese coats the inside of the dish.
IN a saucepan melt the butter and add the flour to it when melted and cook the flour on a low heat, stirring constantly for two minutes. Turn off the flame and add the milk and whisk it like hell. Put the pan back on a low heat and cook it until it gets thick, whisking the whole time to make sure it is not lumpy. Add the spices.
Turn off the flame and egg the egg yolks one at a time, whisking. Then add all the cheese and the spinach and mix well.
In a big very clean bowl beat your egg whites until they are white fluffy peaks. Take one quarter of the egg whites and whisk it into the cheese mixture then fold the rest of the egg whites in carefully. Pour the mixture into the prepared soufflé dish. Turn the oven down to 375 degrees and put the pan in the oven and shut the door for 30 minutes. It is not exactly diet food, but it is worth the calories.
Salmon Tartare on a Baked Beet Chip
Posted: May 22, 2014 Filed under: Recipes | Tags: salmon 1 Comment
I bought a whole side of Salmon, which is just too much for a family of three. After one night of pan sautéed salmon I needed to change up the next salmon meal to try and trick people into eating it.
Nothing could be easier than tarter because it is raw fish cut up and mixed with a few other items. I love tuna tarter with avocado so I wanted to make this a little different than that.
1 pound of Salmon
4 T. capers
2 T. minced Chives
4 T. lemon Juice
Zest of 2 lemons
10 drops of hot chili sesame oil
Black Pepper
Salt if needed if you are eating the tartare straight and not on a salty chip
Baked Beet Chips- Google how to make these or look for a recipe from me later in the week. You can use any kind of chips.
Slice the salmon into ¼ inch slices and then cut it again into ¼ inch pieces
Add all the rest of the ingredients. Let it chill for at least an hour, which will “cook” the salmon in the lemon juice.
If you want you can add diced avocado, shallots, cherry tomatoes, or cucumber.
Cantaloupe Soup
Posted: May 15, 2014 Filed under: Recipes Leave a comment
I let a cantaloupe sit a little too long on the counter. When I cut it open it smelled wonderful, but was just a little too mushy to eat solid. So I made soup with it and I might like this better than plain fruit.
1 whole cantaloupe seeded and cut from the rind
2 T. lemon juice
1 jalapeño pepper- seeded
1 inch of fresh ginger root- peeled
Salt
In a food processor place the ginger and the jalapeño and pulse until minced. Add the cantaloupe and lemon juice and run until pureed. Add a little salt to taste. If your cantaloupe was not sweet enough you may want to add a little honey.
Chill and serve.
You could also substitute fresh mint leaves for the jalapeno for a variation.
Spring Vegetable Hash with a Poached Egg
Posted: May 12, 2014 Filed under: Recipes 1 Comment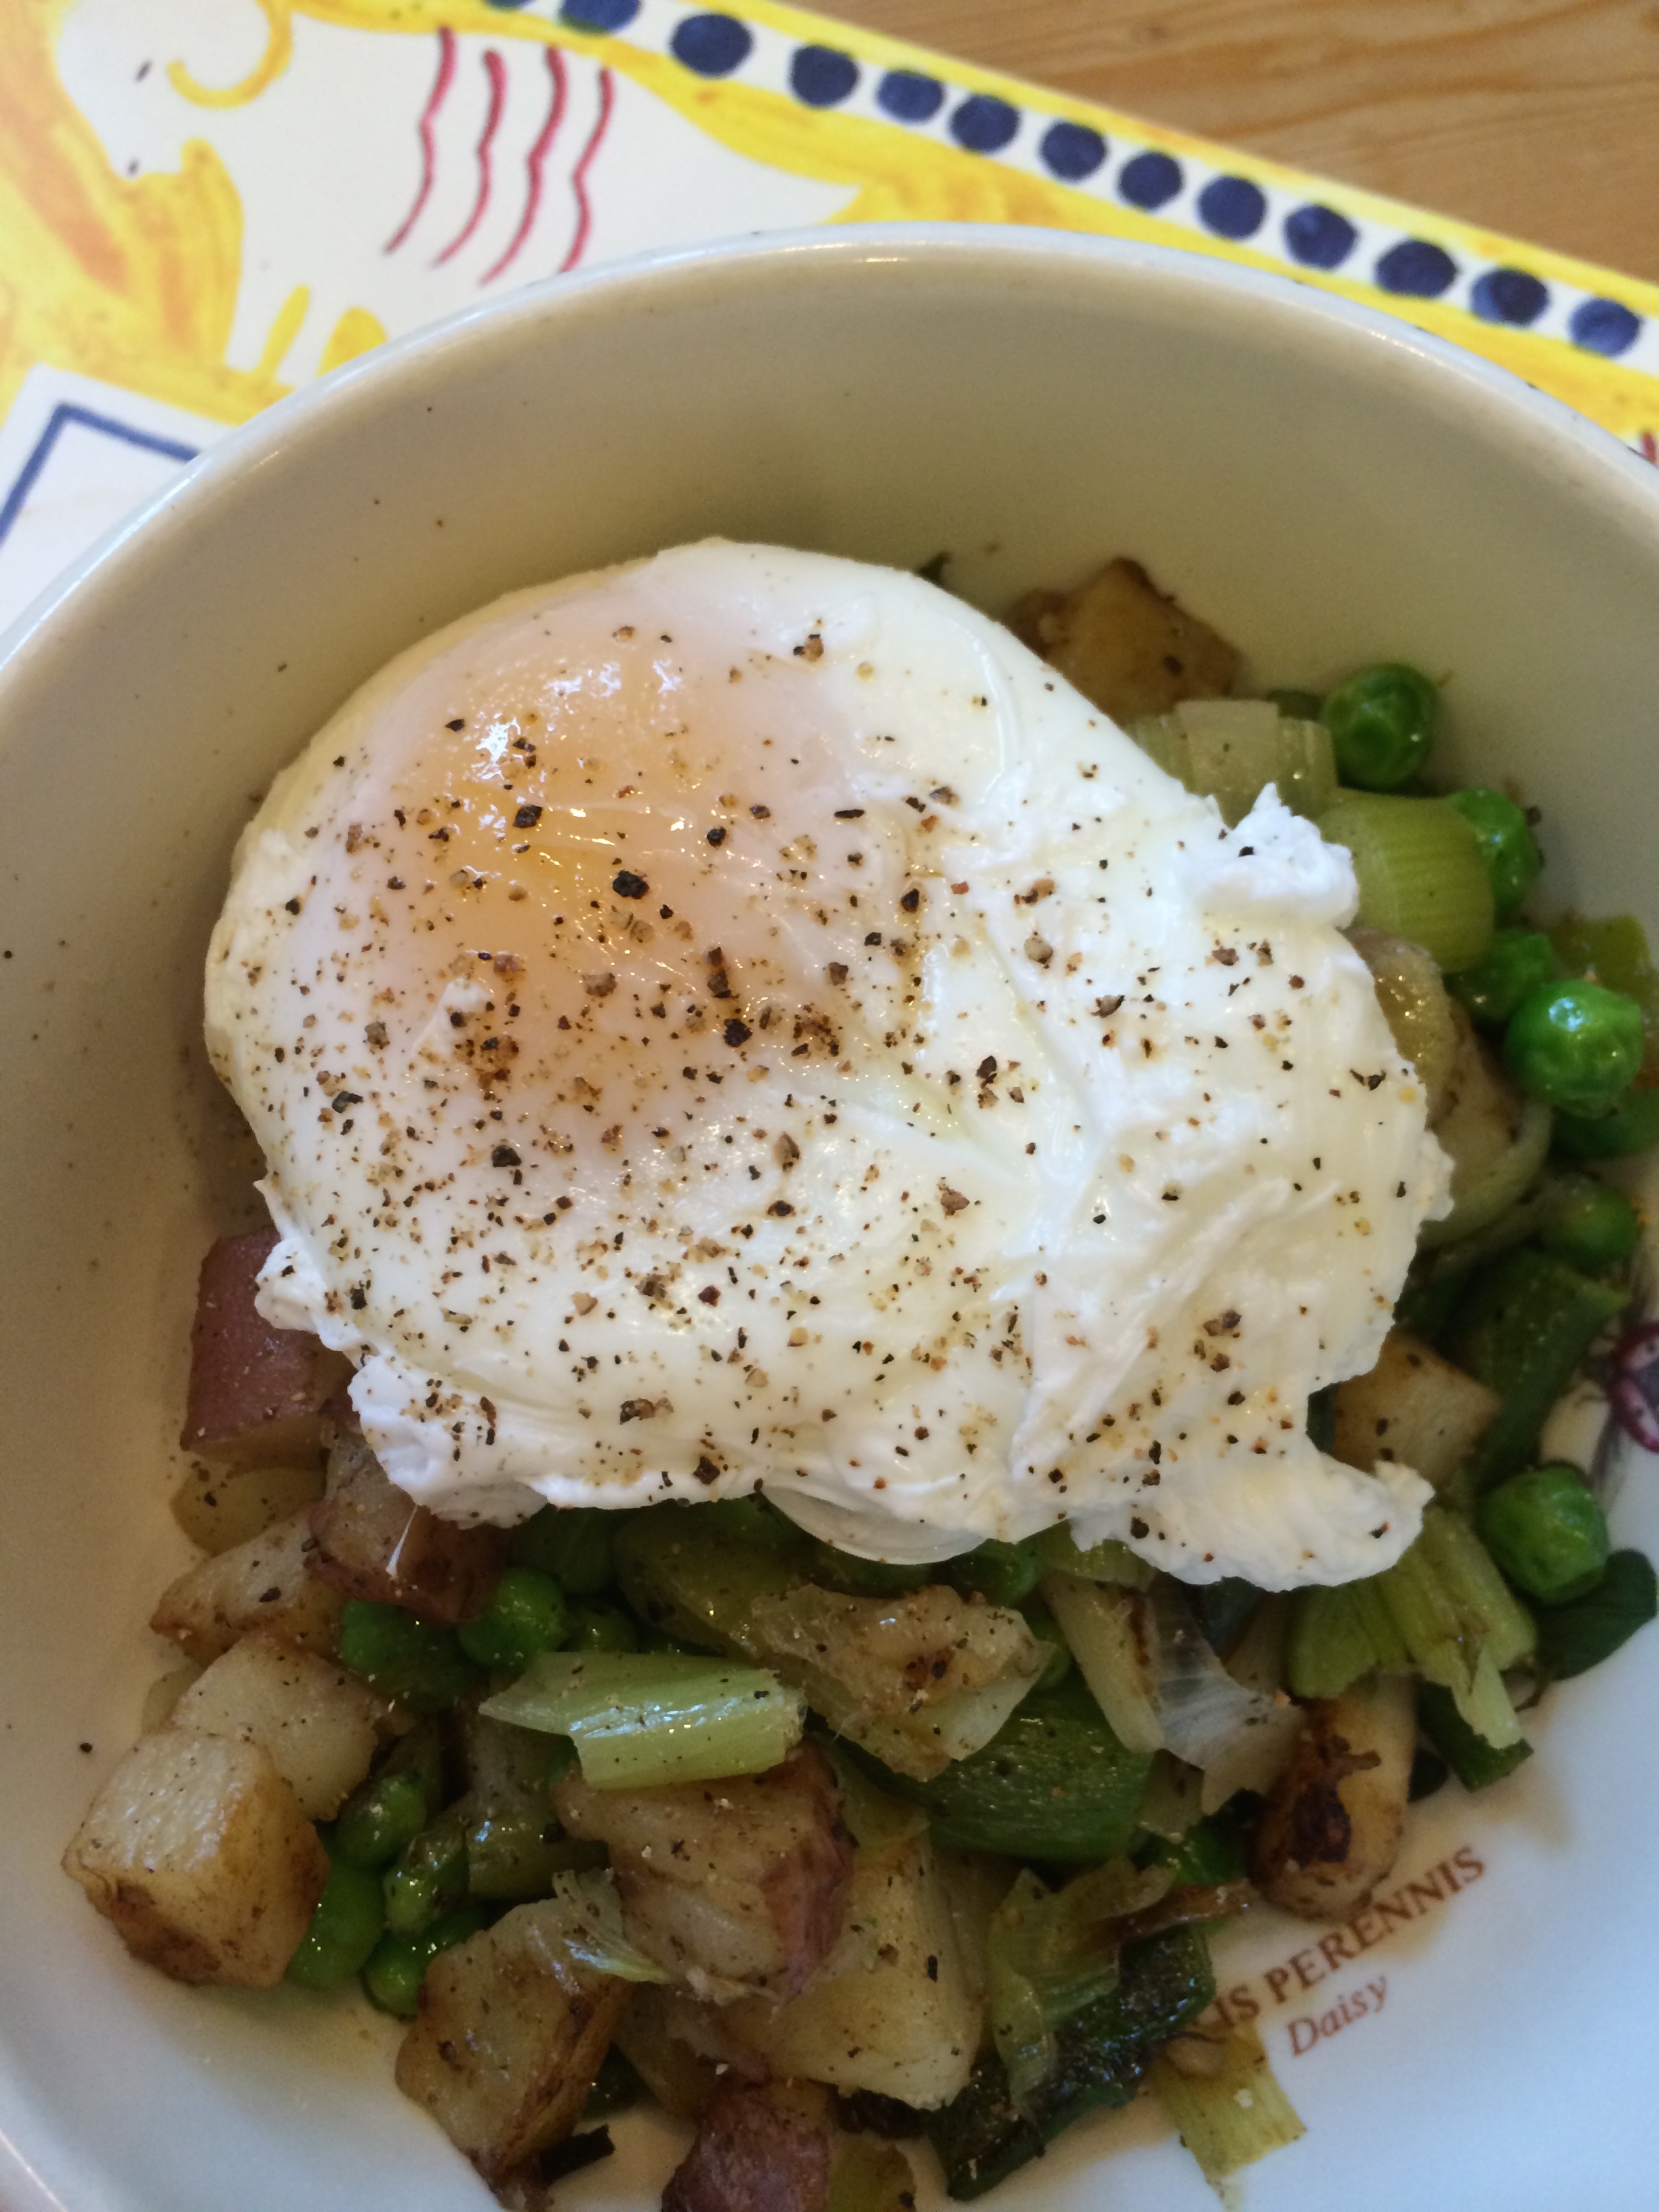
Normally this would not be a dinner that my child would like, but she seemed to think it was OK. You can make it with any vegetables and it is a great way to use up small amounts of leftovers. I just used what was fresh from the farmer’s market.
3 Small Red potatoes – cut into a ½ inch dice
10 asparagus – cut into 1-inch pieces
1 cup of fresh peas
2 leeks – cut into ¼ inch pieces
4 poached eggs
Put the potatoes in a pot of cold water and cook until fork tender- about 10 mins. Drain and set aside. In a separate pan with boiling water cook the asparagus until slightly under cooked. How long depends on how fat your asparagus is my pencil thick stalks took about 2 mins. Pull the asparagus out of the water and add the peas and cook them for two minutes and then drain them and set aside with the asparagus.
Spray a fry pan with Pam and put on a medium heat, add the leeks. Stirring often cook them for three mins and add potatoes and cook another four minutes so the potatoes start to get crispy. Add the green veggies and salt and pepper and cook until everything is hot.
Scoop a quarter of the mixture into a bowl and top with a warm poached egg.
Baked Stuffed Squash Blossoms with Red Pepper Sauce
Posted: May 10, 2014 Filed under: Recipes Leave a comment
Springtime at the farmers market makes me so happy. I was downtown bright and early at 8:00 this morning buying food for the week. Of course I had to make one trip back to the car to drop off my bags half way through shopping because I could not carry my basket of strawberries, bunches of asparagus, stalks of rhubarb, green beans and leeks and still have any hands free to get the rest of the items I was buying.
I ran into my friend Mary Lee who is a regular at the market and she alerted me to the squash blossoms that were for sale. You have to be a very early shopper to be able to get the precious squash blossoms. Most farmers hate to pick the blossoms and thus forgo having squash to sell. I understand this because I too hardly ever take the blossoms off my plants, but I may get over that affliction this year.
So tonight for dinner we had a farmer’s market extravaganza. I will save my spring vegetable hash with poached egg for a blog later in the week. Today you get the Baked Stuffed Squash Blossoms with red pepper sauce. Carter had eaten squash blossoms in Paris so I felt certain she would not turn her nose up at this first course of dinner.
6 squash blossoms – ours were about four inches long which is on the small side
1 oz. of goat cheese – crumbled
¼ cup of Parmesan Cheese- grated
½ cup of ricotta- used fat free
2 Eggs beaten
½ c. Panko Bread crumbs- in a shallow bowl
Salt and Pepper
Preheat the oven to 450 degrees
In a bowl mix all the cheeses and add 3 T. of the beaten egg mixture and salt and pepper. Put the cheese mixture in a Ziploc bag and cut of the tip of one corner to make a pastry bag. Hold the squash blossom in one hand and squeeze the cheese mixture into it packing in as much as possible. It is all right if it comes out the top.
Dip the filled blossom into the egg and then then in the panko coating it on all sides.
Place the flower on a cookie sheet that is covered with foil and sprayed with Pam. Repeat until all the flowers are done.
Place the pan in the oven and bake for about 15 mins until the flowers are golden brown and the cheese is bubbling.
To serve place a large spoonful of red pepper sauce on the plate and place the flowers on top.
Red Pepper Sauce
2 Sweet Red Peppers
1 large Onion- chopped
2 T. half and half
Red pepper flakes
Wash you peppers and then turn a burner on your stove on high. Set the peppers on the grates of the stove and using tongs turn them every so often until most of the skin had blackened. When that has happened place the peppers in a brown paper bag and seal it and let them sweat in the bag until they are cool enough to handle.
Put the onions in a pot sprayed with Pam and cook then on medium heat until they are soft- about 10 mins.
Take the cooled peppers and scrape off the skin and cut them open and discard the seeds and the stem. Add them to the onions with salt and pepper and a couple of red pepper flakes. Add 3 T. of water and the half and half and using a stick blender puree the mixture until smooth. Taste for seasoning.
Paris Revisited Jicama and Green Apple Slaw
Posted: April 19, 2014 Filed under: Recipes 1 Comment
When we were in Paris last month we visited a tiny Bistro called Chez Adrienne twice. It was the only place we loved so much to revisit. It was a tiny four-table place with a chef and one server. The menu was four or five starters and mains written on a chalkboard. On my second visit I had a Jicama and Apple salad as my starter. As is often the case in really good food it was very simple and memorable at the same time.
I have been dreaming of recreating it in a slightly more healthy way since it had mayonnaise in it. The mayo is important so I kept it in this version, but cut down considerably on the amount. After one bite I was immediately transported back.
1 softball sized Jicama- peeled
2 granny smith apples
Juice of one lime
½ cup light Mayo
3 packets of Splenda
Salt and Pepper
It is quick and easy to make this if you have a shredding attachment for a food processor. Grate the peeled Jicama and then grate the granny smith apple with the skin on. Place it all in a bowl and mix in the other ingredients. It is too dry add a little more limejuice before adding more mayo.
Mango Mint Slushy
Posted: April 15, 2014 Filed under: Recipes Leave a comment
The mint has started to come up in my garden and the only way to keep it from taking over is to find ways to use it.
I bought a boatload of mangos the other day because they are my favorite cheep fruit right now. I decided to make a mango drink. I did not want to make a smoothie with any dairy just because I did not want the added calories. So I made a slushy—it would be a great base for a libationous drink too, so if you feel inclined add some tequila, rum or vodka.
Flesh of one mango
8 big mint leaves
2 T. limejuice
1 cup of soda water and 1 cup of crushed ice
Depending on how sweet your mango is you might want to add a few drops of honey
Put all the ingredients in a blender- drink. You think you can follow that recipe?
Sweet and Sour Beef – More German than Chinese
Posted: April 7, 2014 Filed under: Recipes | Tags: beef Leave a comment
This weekend my friend Suzanne asked me how my eggs and cabbage recipe really tasted because it was the worst looking food photo she had ever seen. I agreed that the picture was bad, but that the flavor was good. The picture did look exactly like the dish, not that appetizing.
I’m writing this recipe before I take the picture and I hope that it is a good picture because I just tasted this dish and it is yummy. Sometimes when I make up a new dish that has a long cooking time I am just winging it and hope for the best. This is one of those times, but I am glad that I wrote it down before I forgot what I put in it because it is a keeper.
3 pounds of stew beef or short ribs
3 yellow onions
6 cloves of garlic
A knob of ginger about the size of an egg -peeled
1 c. Sherry
¼ c. soy sauce
¼ cup rice wine vinegar
¼ c. sugar
1 c. beef broth
¼ teaspoon red pepper flakes
1T. Coriander
¼ t. cinnamon
1 bottle of chili sauce
Salt and pepper
Preheat oven to 300 degrees.
Using a Dutch oven, heat the pan on the stove on high heat. Spray with Pam. Salt and pepper the raw beef and brown in batches so you don’t crowd the meat in the pan. When all sides of the meat are browned, remove from the pot and set aside until all the meat is browned.
Put the onions, garlic and ginger in the food processor and pulse until it is chopped. Add to the Dutch oven and turn the heat down to medium and cook for five minutes. Add the sherry, soy, vinegar, sugar, broth, and spices and bring to a boil.
Add the meat back to the pan and pour the chili sauce into the pan. Cover with lid and place in the oven.
Cook for two to three hours depending on the size and toughness of your meat. It should be fork tender. Remove the pot from the oven and take the meat out of the pan and put it in a container covered to keep it warm.
Put the Dutch oven with the liquid on the stove and with the top off simmering it for 30 minutes to reduce the sauce by at least half. Spoon the sauce over the meat to serve.
Broccoli Cheese Soup
Posted: February 16, 2014 Filed under: Recipes | Tags: broccoli, cheese, onions, soup. carrots Leave a comment
I went to the movies with my friend Lynn this afternoon rather than write my blog, or cook dinner. When I got home late I decided I could throw together a soup to satisfy both needs.
1 softball-sized onion chopped
2 carrots- peeled and chopped
A bunch of fresh thyme tied together in a bundle or 1 T. dried Thyme
2 cups chicken stock
3 big stalks of broccoli
1 can of fat free evaporated milk
1 cup of shredded cheese- I used three kinds, cheddar, parm and jarlsburg
Salt and Pepper
In a big stockpot sprayed with Pam cook the onion on medium heat to soften for about five minutes. Add the carrots and thyme and cook another three minutes stirring every so often.
Bring a separate saucepan with two inches of water in it to a boil. Cut the trunks from the broccoli and using a vegetable peeler peel away all the tough outside parts of the broccoli and then chop the trunks up and put in the boiling sauce pan and cook about five minutes until they are tender.
Roughly chop the remaining tops of the broccoli and set aside.
Add the chicken stock to the main big stockpot with the onions and carrots and bring to a simmer.
After the broccoli stalks are cooked use a slotted spoon and remove them from the boiling water and add them to the main stockpot with the onions mixture.
Add the rest of the broccoli tops to the boiling water in the saucepan and cook that for two minutes or until it is tender. Drain that broccoli and add it to the main stockpot. If you used a bundle of thyme remove it from the pot now scraping as many little leaves off into the soup as you can. Add the can of evaporated milk and bring the whole mixture to a boil and reduce to simmer for two minutes. Take the pot off the heat and using a stick blender blend the soup slightly, leaving the vegetables a little big.
Put the pot back on medium heat add the cheese and stir the soup just so the cheese melts, about a minute. Salt and Pepper and serve.
Olympic Watching Cabbage, Onions and Eggs
Posted: February 10, 2014 Filed under: Recipes | Tags: cabbage, eggs, onions Leave a comment
In the spirit of the Olympics and wanting to use up a cabbage that was in my veg drawer I made up this three-ingredient dish that is reminiscent of Russian peasant food. It does not look or sound as appetizing as it tastes, but on a cold dark snowy night it will keep you warm and satisfied.
1 small green cabbage shredded
1 medium onion thinly sliced
4 eggs – beaten
Salt and Pepper
Spray a large skillet with Pam and place the cabbage and the onions in it on a medium heat. Cook, turning the vegetables often for about ten minutes, until they are wilted and the cabbage is not giving out any more liquid. Salt and pepper the vegetables. Pour the eggs into the pan with the veg and stir until the eggs are lightly cooked, about one minute. Taste for seasoning, more pepper is better.
Serve immediately
Roast Gingered Carrots
Posted: February 1, 2014 Filed under: Recipes | Tags: carrots, ginger Leave a comment

Today I made dinner for my friend Nancy who had hand surgery. If you have any trouble with your hands you certainly can’t cook, but you feel well enough to eat. That merits a delivered meal in my book. Since it is still the healthy eating season, until the Super Bowl tomorrow when all diets go out the window, I tried to make her something she would not curse me for when she got on the scale.
One of the items I made was roast-gingered carrots. Russ had our friend and neighbor Cliff over for a meeting while I was cooking and he just e-mailed me a request for the recipe since he said he has never had great luck roasting carrots. Killing many birds with one stone and giving the recipe here.
2 pounds of Carrots – sounds like a lot but these are so addictive it might just be enough for 3 people
1 T. butter
1 inch of fresh Ginger root- peeled and frozen is easiest
Salt and pepper
Preheat the oven to 400 degrees. I use a convection oven so you might need to add a few minutes to your cooking time if you do not.
Peel the carrots and cut off the ends. Cut the carrots in half to have a skinny end and a fat end.
Cover a cookie sheet with foil and spray with Pam. Place the fat end carrots on the foil and spray the carrots with a light dusting of pam. Place in the oven and cook for ten minutes. Add the skinny carrots and spray them with Pam and put back in the oven for another 20 minutes.
The side of the carrot touching the foil should start to get brown and you may want to turn the carrots part of the way through roasting.
When the carrots are tender and lightly brown take the pan out of the oven and rub a little butter over then.
Take your peel ginger root – I keep mine in the freezer and that makes this next step easier. Using a micro plane grate the ginger liberally all over the carrots. Salt and pepper and serve. They are good cold, hot or room temp. Actually they are really like candy so give them to your kids too.
Thai Lettuce Cups
Posted: January 23, 2014 Filed under: Recipes | Tags: chicken, thai Leave a comment
It may be cold out and lettuce cups seem like a summery thing, but boy are they good. This is the perfect food for flavor and hardly any calories.
Make the meat mixture
8 oz. mushrooms- finely chopped in the Cuisineart
5 boneless skinless chicken thighs
5 cloves of garlic
1 inch of ginger root grated finely
2 T. fish sauce
2 T. Mirin
1 t. soy sauce
½ t. red pepper flakes
I small can of water chestnuts mined
In a fry pan sprayed with Pam cook the mushrooms on a medium heat for five mins. Take out of the pan and set aside in bowl. Put the garlic cloves in the cuisineart and chop finely, add the chicken thighs and pulse until minced. Add the garlic and chicken to the fry pan and begin cooking on medium heat, add the ginger root. After the chicken is almost cooked through, about five minutes add the fish sauce, mirin, soy and red pepper flakes. Cook another two minutes add the water chestnuts to heat up.
Prep all the veggies:
Iceberg lettuce – cut head in half
Carrot Slivers
Marinated Cucumbers – English cucumbers thinly sliced with splenda, rice wine vinegar and fish sauce
Cilantro
Bean Sprouts
Cocktail peanuts
Optional Asian sweet and spicy sauce – I used a Shitake Soy ginger sauce
Carefully pull the lettuce leaves apart into cups. Spoon two heaping spoonfuls of meat mixture into the cup; add some carrots, cucumbers, and bean sprouts. Sprinkle a few peanuts and cilantro leaves on top and a spoonful of sauce.
It’s hard to eat neatly so have lots of napkins to clean the drippy parts off your chin. You can thank me later.
Roast Green Beans, Pearl Onions and Cherry Tomatoes in a Balsamic Glaze
Posted: January 12, 2014 Filed under: Recipes | Tags: balsamic vinegar, cherry tomatoes, green beans, pearl onions Leave a comment
I walked on my treadmill and needle pointed today after Church and could not think of anything to write about so I went to the freezer to see what needed to be used up so I could create a recipe for the blog. I found a lovely bag of frozen pearl onions from Trader Joes, a bag of fresh green beans was in the veggie drawer and a pint of cherry tomatoes on the counter. Here it goes
1 lb of pearl onions- I used frozen so I thawed them in the microwave
1-½ lbs. of green beans with the stem end cut off
1-pint cherry tomatoes
1 T. honey
3 T. Balsamic Vinegar- I used a really good one that is thicker than most
Salt and pepper
Preheat the oven to 425 degrees. On a half sheet pan covered with foil and sprayed with Pam put the green beans in a single layer and put in the oven to roast for about 20 mins. or until browned.
On a second sheet pan covered with foil put the thawed pearl onion in a single layer and place in the same oven and cook until they are brown, about 20 mins.
When both are cooked put the cherry tomatoes in a skillet and put on a medium high heat on stove, add the honey and vinegar and cook until the cherry tomatoes just start to burst. Add the green beans and onions and salt and pepper to taste.
Dana’s Version of Wagamama’s Hot Pot
Posted: January 8, 2014 Filed under: Recipes | Tags: Chicken Hot Pot Leave a comment
I got a bunch of requests for this recipe after my post yesterday about my trip to the Asian Market to buy the ingredients. I don’t usually post other people’s recipes since I try and keep pure to ones I create, but I changed theirs some so here is my version. It makes a great light meal for those of you who are still keeping to your resolutions.
Mine took a while to make since I made my own homemade chicken stock, but after going to all that trouble I feel like a good quality stock in the box would be exactly the same, but a whole lot easier.
3 C. Good Chicken Stock
1 T. Dashi No Moto – that is instant Dashi and the brand at Li Ming is HonDashi
1 T. Mirin, sweet rice wine (You can use vermouth)
1 T. soy sauce
3 boneless skinless chicken thighs cut into bite size strips
1 C. Sugar Snap Peas
1 C. fresh oyster mushrooms cut into bite size pieces
3 C. Napa Cabbage cut in 1-inch strips
4 Scallions cut into ½ inch pieces, green and white
2 C. Mung Bean Sprouts
Handful of chopped Cilantro
4 T. Fish Sauce
Cooked Noodles, sobu, ramen or udon – optional
Siracha sauce-optional
Put the chicken stock, dashi, Mirin, and soy sauce in a saucepan and bring to a boil, add the chicken, reduce to simmer and cook for three minutes.
While that is cooking divide up the mushrooms, cabbage and scallions and noodles if you want them, into four large bowls.
After the chicken is cooked add the sugar snap peas and cook for just one more minute. Ladle the hot broth, chicken and peas over the other vegetables and sprinkle with bean sprouts, one Tablespoon of Fish Sauce per bowl to taste and a little cilantro on top. I like to add siracha sauce for a little heat. Enjoy!
Sweet Potato, Brussels Sprout, Hash
Posted: December 16, 2013 Filed under: Recipes | Tags: Brussels Spouts, sweet potatoes Leave a comment
Carter calls this fancy food, which is the opposite of what a hash is. Any winter vegetables would work in this.
2 Sweet Potatoes peeled and cubed into ½ inch chunks
2 cups of Brussels sprouts halved
1 large onion chopped
1 cup of sliced mushrooms
Pinch of nutmeg
Salt and pepper
To ensure that everything is cooked properly I cook each vegetable individually and then mix it together. In a fry pan, sprayed with Pam put the sweet potatoes on medium heat and add ½ cup of water. Cook until all the water is out and then stir often until the sweet potatoes are soft and brown a little, salt and pepper them. Set aside. Do the same with the Brussels spouts, adding nutmeg and salt and pepper at the end.
Sauté mushrooms and onions in a fry pan and mix it all together with the cooked sweet potatoes and sprouts.
Sweet Potato Apple Bisque
Posted: December 4, 2013 Filed under: Recipes | Tags: apples, soup, sweet potato 2 Comments
Yesterday I made the trek over to the farmer’s market in Raleigh to buy my boxwood wreaths. While I was there I perused the fruits and vegetables being sold by local farmers. I am known to love a deal or two so I could not resist buying a forty-pound box of sweet potatoes for $20. Carter of course thought I was nuts, but they will keep through the winter in the garage and are the most nutritious starch I can think of. I also bought a half-peck of local apples. I was able to sample the different varieties so I got some pink ladies, honey crisp, crimson crisp and Fuji.
So with my larder full I of course needed to make something for dinner with my haul. Tonight’s dinner is soup that is gluten, dairy and meat free yet still yummy. Now I eat dairy so I garnished mine with a dollop of fat free sour cream. I am very happy.
1 large onion chopped
3 celery ribs chopped
1 T. thyme
4 cloves of garlic minced
2 T. ground cumin
1 t. ground cloves
1 t. allspice
Salt and pepper
3 cups of stock (vegetable or chicken)
1 cup of apple cider
1 cup of water
3 large sweet potatoes – peeled and chopped
3 apples – peeled and chopped
Spray Pam in a large stockpot and add the onions, celery and thyme. Cook on medium high heat for five minutes. Add garlic and spices and cook another two minutes, stirring often. Add the liquids, potatoes and apples, cover and simmer until tender about 25 minutes. Using and immersion blender puree the soup and taste for salt and pepper.
Leftover Roast Vegetable Salad
Posted: December 2, 2013 Filed under: Recipes | Tags: roast vegetable salad 2 Comments
By now all the good parts of the Thanksgiving meal are certainly gone. If you have any stuffing or pecan pie raise you hand and wave it wildly. No flapping arm fat on you.
For most of us the things that are left are the things you tell your children they have to take one bite of and even then they do it under protest. Don’t throw those roast vegetables away; repurpose them to a sweet and savory salad.
1 lb oven-roasted green beans
1 head of oven-roasted broccoli
½ a red onion minced
1-pint cherry tomatoes halved
¼ cup yellow raisins
2 T. capers
3 T. sherry vinegar
5 packets of Splenda
Salt and Pepper
Mix everything together and watch it disappear.
Stewed Tomatoes, Okra and Onions
Posted: November 6, 2013 Filed under: Recipes | Tags: Okra, onions, tomaotes 1 Comment
Fresh Okra is still available but is not quite as tender as it is in the height of the summer. To make the most of the slightly tougher okra I like to cook it with canned stewed tomatoes and lots of onions. Frankly, anything cooked in lots of onions will taste better.
1 big yellow onion chopped
4 cloves of garlic minced
2 15 oz. cans of stewed tomatoes
1 T. grated fresh ginger root
½ t. ground cardamom
¾ of a pound of fresh okra cleaned and cut into thirds
Dash of sugar
Salt and pepper
Spray a pot with Pam and put on a medium high heat on the stove. Add the onions and cook for a few minutes until they get transparent, stirring to prevent sticking. Add the garlic and cook another minute. Add the cans of tomatoes, ginger and cardamom and cook for twenty minutes, stirring to prevent sticking. Add the okra and 1 cup of water and cook covered for another twenty minutes. Remove the lid and add the sugar and salt and pepper and cook uncovered until the stew gets thick, about five minutes.
Sirloin Pork Roast with Apples and Mustard Gravy
Posted: November 3, 2013 Filed under: Recipes | Tags: apples, mustard, pork, sage Leave a comment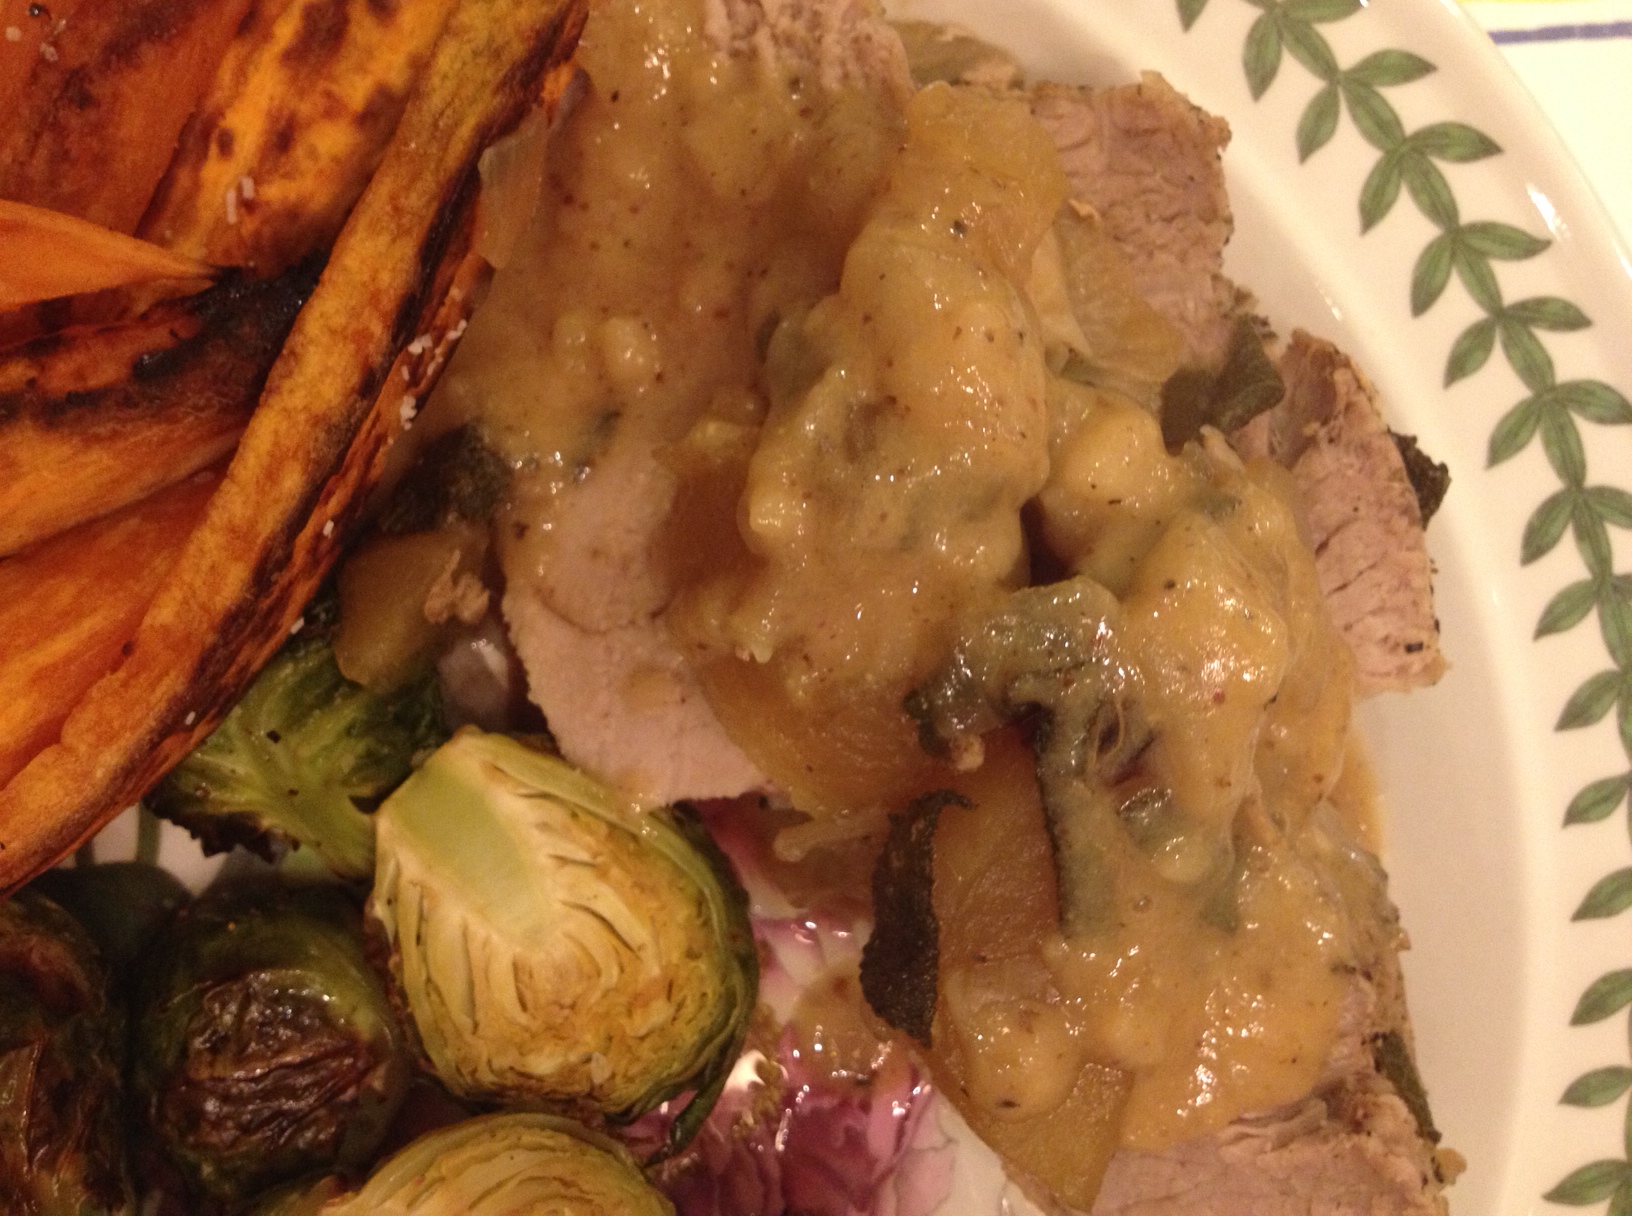
In the back to basics move I decided to make a roast for dinner. I realized while I was cooking that I needed a lot more steps to reach my 10,000 step goal today so I ran around the kitchen never stopping while I chopped, stirred and seasoned. I don’t recommend this strategy for most because you might lose a finger.
While the roast was resting I took Shay Shay out side to run off a few more steps. My neighbors the Andersons were driving away from home and stopped to ask how the tracking my steps was going. I kept dancing around their car as I answered them. Mary Eileen said she wished she had a blog so she could write what a nut I looked like. The things I will do to reach my goal.
Russ declared this dinner a big winner so give it a try.
1 four pound Sirloin Pork Roast
1 big onion – chopped
2 apples – peeled and chopped
1 can of chicken broth
10 big fresh sage leaves minced or 1 T. of ground sage
Salt and pepper
1 ½ T. butter
2 T. flour
3 T. Dijon mustard
Preheat the oven to 350 degrees. Spray a Dutch oven with Pam and put it on the stove on high heat. Pat the pork roast dry with paper towels and sprinkle lots of salt and pepper all over it. Brown the meat in the Dutch oven, turning it on all sides. This will take about ten minutes.
When you have turned the meat onto the last side to be browned add the sage, and onions. After the meat is browned on all sides add the apples and the chicken broth and keep the pan on the stove until the liquid just starts to bubble. Then put a lid on the pan and place it in the oven.
Bake for about 30 minutes until the meat reaches 160 degrees using a meat thermometer. Take the meat out of the pan and spoon the apples and onions over it, leaving the liquid in the pan to use for gravy. Tent with foil to keep it warm.
To make the gravy melt the butter in a frying pan on medium heat, add the flour and stir it into the melted butter cooking it for a minute. Add the pan juices from the roast to the butter and flour roux stirring with a whisk. Add the mustard and continue cooking until the gravy is the desired thickness, it should only take a few minutes.
I served mine with roast Brussels Spouts and sweet Potato Oven Fries.
Using Up Halloween Chocolate Candy Peanut Butter Pie
Posted: November 1, 2013 Filed under: Recipes | Tags: halloween candy, peanut butter 3 Comments
I rarely post anything so fattening on this blog, but I was bound and determined to use up this Halloween candy. I made it into a peanut butter pie with a pretzel crust that I will freeze and give away.
1 ½ Cups of crushed pretzels
¼ cup of brown sugar
4T. of melted butter
Mix together and press into a pie pan. Bake in 350-degree oven for ten minutes and remove from oven and let cool.
10 mini or fun size chocolate candy bars chopped up- I used snickers, heath bars, twix, Rollo and kit kats. Sprinkle on the crust.
1 pkg of cream cheese
¼ cup of sour cream
½ cup of peanut butter
1 egg
Beat all these ingredients together and spoon over the candy. Bake in 325-degree oven for 35 minutes. Chill and cover the pie with whipped cream when you serve it.
Cut pieces for everyone else and run out of the house before taking one bite your self.
Creamed Spinach Stuffed Mushrooms
Posted: October 1, 2013 Filed under: Recipes | Tags: mushrooms, spinach Leave a comment
This recipe marries are two yummy steak house staples, Creamed spinach and sautéed mushrooms. In their restaurant version they are much more fattening than this rendition.
1 pound of fresh baby spinach or one 10 oz. package of frozen spinach
1 small onion minced
2 T. cream cheese
¼ C. milk
1 t. butter
1 T. flour
Dash of nutmeg
Salt and pepper
1 pound of big mushroom caps- stemmed
3 T. Parmesan cheese
Preheat oven to 350 degrees.
In a skillet, sprayed with Pam, sauté the minced onions. Remove from the pan and set aside in a bowl. If using fresh Spinach add it to the pan and cook on medium high heat turning it often until wilted, about one minute. If using frozen cook according to package and squeeze dry.
In a small saucepan melt the butter and add the flour and cook on medium heat stirring for one minute. Add the milk, keep stirring and cook for one minute. Add the cream cheese, nutmeg, the cooked onions and spinach. Remove from heat, salt and pepper to taste.
Spoon a small spoonful of creamed spinach into each mushroom cap. Place on a jellyroll pan. Place in hot oven and bake for 20 minutes. Pull the pan out of the oven and sprinkle each mushroom with Parmesan cheese and place back in the oven for five more minutes.
Grilled Baby Artichokes
Posted: September 3, 2013 Filed under: Recipes | Tags: Grilled Baby Artichokes 3 Comments

Russ came home with a big bag of purple baby artichokes. When we were on the west coast last year we had grilled artichokes a couple of times and found that putting the artichoke over a fire gave it a new layer of flavor. The only problem with most of the ones we ate in restaurants was they were not cooked enough so it was tough to scrape off the yummy flesh from the outer leaves. So I tried to boil these artichokes first and then put them on the fire. Did the trick!
Baby artichokes
Lemon juice
Olive oil
Kosher salt
Sauce
Light olive oil mayonnaise
Lemon juice
Cracked black Pepper
Cut the artichokes in half and using a spoon scoop out the choke. Place the artichokes in a bowl with water and the juice of half a lemon as soon as you have cut them.
In a stockpot big enough to hold all the artichokes bring two inches of water to a boil. Add the artichokes and cook on high heat covered for five minutes. (If you are using big artichoke boil them for at least 30 minutes)
Remove the artichokes from the pot with a slotted spoon and put in a bowl. Sprinkle a little olive oil and salt over them.
Heat the grill to fairly hot and place all the artichokes on the grate cut side down. Put the lid on the grill and cook them for four minutes. Flip them over and cook on the other side for three minutes. Remove them from the grill and put them back in the bowl. Cover the bowl with plastic wrap so the heat will stay in helping steam the artichokes.
They can be served hot, room temp or cold.
I made a dipping sauce that was 3 T. light mayo with the juice and zest of one lemon and a bunch of cracked black pepper. YUMMY!
Eggplant Pesto Bake
Posted: August 26, 2013 Filed under: Recipes | Tags: eggplant, pesto 1 Comment

I found two nice Eggplants in my garden today so that’s what’s for dinner tonight. In our house there is nothing as good as eggplant Parm, but there is also nothing more fattening. So in a spirit of a healthier version I made up this recipe. I pre-baked all the vegetables separately so I could coax the best flavor from each. I left out tomatoes sauce because it has too much sugar and I greatly reduced the cheese. Since I was not frying the eggplant I added a few sliced potatoes for structure and Pesto to get a big flavor.
2 big eggplants sliced into ½ inch rounds
3 medium Yukon gold potatoes sliced very thinly with the skins on
4 tomatoes sliced
2 large yellow onions sliced thinly and caramelized (recipe follows)
1 cup of basil pesto
2/3 cup of mozzarella and Parmesan – any proportions you want
Make the caramelized onions.
Preheat the oven to 425 degrees. Line a couple of jellyroll pans with foil and spray with pam. Put a cooling rack on one pan and layer the eggplant on the rack. Spray with Pam and place in oven and cook until the eggplant is browned, about 30 minutes. On another pan layer the tomatoes and spray with Pam, salt and pepper and place them in the oven, cook until the water cooks out of the tomatoes, about 30 minutes. On a third pan layer the potatoes and spray them with Pam, salt and pepper and place in the oven, cook until lightly browned, about 10 minutes.
Once you have cooked all the parts spray an oblong shallow pan with pam. Place a layer of half the potatoes down, followed by all the caramelized onions, and half the Pesto. Place a layer of half the eggplant, and start again with the potatoes, pesto, eggplant and end with the tomatoes. Sprinkle cheese on top and place the whole thing back in the oven and bake about 20 minutes until the cheese is melted. Good served hot or at room temp.
Caramelized Onions – master recipe
Caramelized onions are one of the truly great low calorie foods. I make big pans of them and then divide them up into smaller portions and freeze them.
They can be used to top a turkey burger that is just a little bland, or put in a sandwich to add some depth of flavor. Added to tomato soup, even canned, they will make your mouth so happy.
They are easy to make, but still take a little time. Always cut more onions than you think you will need they cook down to less than ¼ their original volume.
Sweet onions
Pam
Sugar
Salt
Slice onions. Spray Pam in a large frying pan and put onions in it. Place on medium low heat on stove. Cook low and slow, stirring every so often. After about 20 minutes the onions should start to get golden brown. Don’t try and get there faster by making the heat higher. The low and slow develops the onions natural sugar. When they get to the color in the picture sprinkle a tiny amount of sugar on top and stir. Continue cooking about 5 more minutes until they get brown. Putting the sugar on too soon will make them burn. Salt to taste when done.
Use them on everything. I love them in salads, mixed in eggs or in a grilled cheese, but that’s not very figure friendly.
